Store Git SSH key pair in Linux with Libsecret to skip asking for credentials
If you have to connect to Git via SSH, your usual credential manager may be not enough. Read how to avoid entering password every time on your Linux device.
I have already introduced Libsecret Git credential manager, which works fine if you connect to remote repo via http(s), which is what we usually do. But sometimes we are forced to use SSH protocol, and once again we need to write password every time we interact with remote repo. Luckily it can be solved in secure way quite easily, but unfortunately descriptions which I found on the internet are not clear, moreover usually skip securing private keys. My goal is to explain it in this article in simple words, so you can apply it and understand what you do.
How automate SSH connection works
Mechanism which is used in SSH to automate connections is really simple. You generate public-private keys pair (those keys are not related to credentials nor any other data), hide private key with you and share public key with server. Then when you try to connect to server, your clients uses private key as prove that you’re allowed to connect - that’s it.
It sounds quite magically, but it’s really simple. Those keys are just text files, stored somewhere on your device, usually in ~/.ssh directory. They are not related to any data, it’s just a pair which suits each other, in mathematical meaning, you generate it with OpenSSH tool. Look at this example (with default file names id_rsa and id_rsa.pub):
Private key file: ~/.ssh/id_rsa
-----BEGIN RSA PRIVATE KEY-----
MIICXAIBAAKBgQCqGKukO1De7zhZj6+H0qtjTkVxwTCpvKe4eCZ0FPqri0cb2JZfXJ/DgYSF6vUp
wmJG8wVQZKjeGcjDOL5UlsuusFncCzWBQ7RKNUSesmQRMSGkVb1/3j+skZ6UtW+5u09lHNsj6tQ5
1s1SPrCBkedbNf0Tp0GbMJDyR4e9T04ZZwIDAQABAoGAFijko56+qGyN8M0RVyaRAXz++xTqHBLh
3tx4VgMtrQ+WEgCjhoTwo23KMBAuJGSYnRmoBZM3lMfTKevIkAidPExvYCdm5dYq3XToLkkLv5L2
pIIVOFMDG+KESnAFV7l2c+cnzRMW0+b6f8mR1CJzZuxVLL6Q02fvLi55/mbSYxECQQDeAw6fiIQX
GukBI4eMZZt4nscy2o12KyYner3VpoeE+Np2q+Z3pvAMd/aNzQ/W9WaI+NRfcxUJrmfPwIGm63il
AkEAxCL5HQb2bQr4ByorcMWm/hEP2MZzROV73yF41hPsRC9m66KrheO9HPTJuo3/9s5p+sqGxOlF
L0NDt4SkosjgGwJAFklyR1uZ/wPJjj611cdBcztlPdqoxssQGnh85BzCj/u3WqBpE2vjvyyvyI5k
X6zk7S0ljKtt2jny2+00VsBerQJBAJGC1Mg5Oydo5NwD6BiROrPxGo2bpTbu/fhrT8ebHkTz2epl
U9VQQSQzY1oZMVX8i1m5WUTLPz2yLJIBQVdXqhMCQBGoiuSoSjafUhV7i1cEGpb88h5NBYZzWXGZ
37sJ5QsW+sJyoNde3xH8vdXhzU7eT82D6X/scw9RZz+/6rCJ4p0=
-----END RSA PRIVATE KEY-----
Public key file: ~/.ssh/id_rsa.pub
-----BEGIN PUBLIC KEY-----
MIGfMA0GCSqGSIb3DQEBAQUAA4GNADCBiQKBgQCqGKukO1De7zhZj6+H0qtjTkVxwTCpvKe4eCZ0
FPqri0cb2JZfXJ/DgYSF6vUpwmJG8wVQZKjeGcjDOL5UlsuusFncCzWBQ7RKNUSesmQRMSGkVb1/
3j+skZ6UtW+5u09lHNsj6tQ51s1SPrCBkedbNf0Tp0GbMJDyR4e9T04ZZwIDAQAB
-----END PUBLIC KEY-----
You store both files in your device and save public one in server which you want to connect, at proper path - that’s it. If you want to read more about key pair mechanism, article on ssh.com explains it nice.
How to configure automatic SSH connection
Once you know the theory, it’s time to try automated connection in practice. First I will show you the process with Seahorse tool which I find convenient for this task, but of course you can achieve the same with command line, which I will show later.
In Ubuntu and Linux Mint Seahorse comes pre installed with OS and you can find it as Seahorse or Passwords and Keys. I’m pretty sure it’s not difficult to install it in other distros, so if you don’t have it already, just search how to install it in your case. It uses libsecret abstraction which was created to unify access to sensitive data, so it should work on all popular Linux distributions.
If you don’t see secrets categories on the left side of Seahorse, set View » By Keyring.
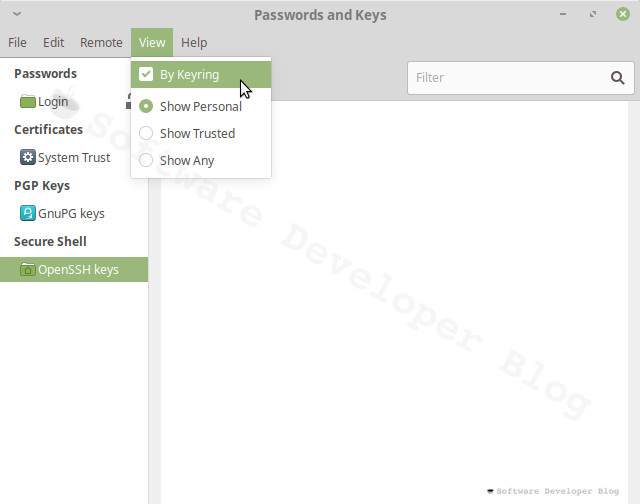
Create SSH keys
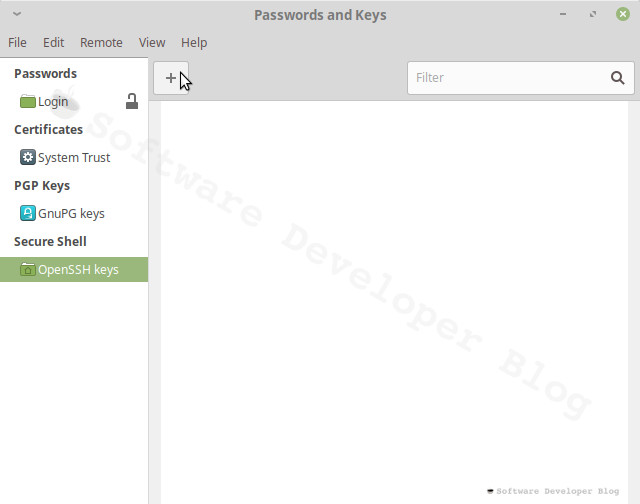
Choose OpenSSH Keys category and press + button
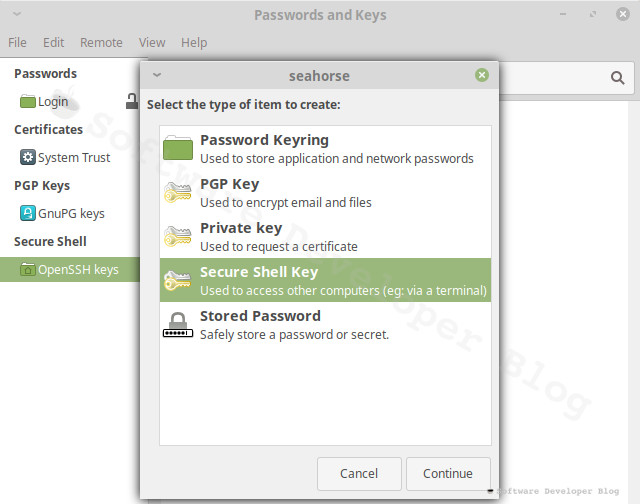
Select Secure Shell Key
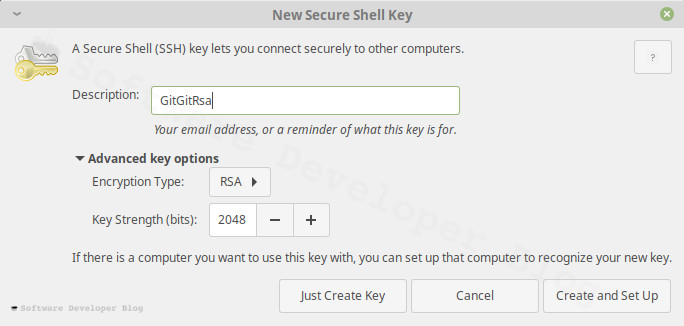
Now give your keys some description, to remember what is this for. This name will be seen on server, so you can write here your email address, to simplify server administration (so maintainer could know who uses this and if it’s still required).
Choose encryption type - at the time of writing the only available options in Seahorse are RSA and DSA - it’s a bit subjective, but I suggest choosing RSA as explained on security.stackexchange.com. There is a way to choose Ed25519 algorithm which is more secure and gives better performance, but currently only from command line.
RSA key strength can be left 2048 bits as is by default. You can increase it, but be aware that some devices may not support it and that it takes a bit more of resources to work with bigger number. But if you insist, 4096bits should be fine. Here is nice article which explains RSA key size topic with details.
From this point you can choose two options:
- Just Create Key
- Create and Set Up
With second option you will populate newly created key to server right from this wizard, so that’s what we will do.
If you don’t have access to server at this moment, you can just create key and populate it later from command line.
Encrypt SSH keys with password
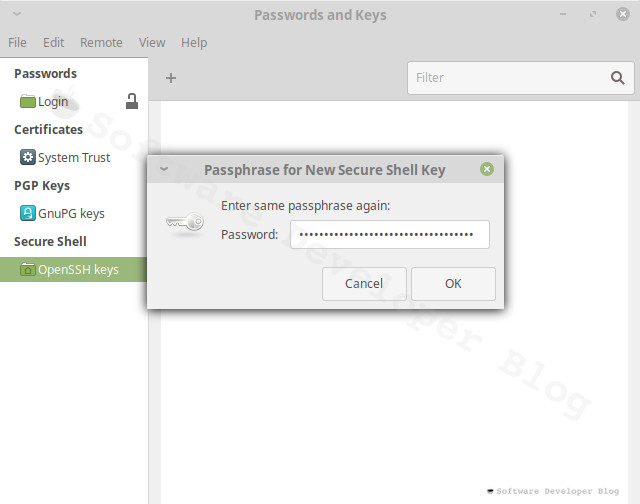
Next you will be asked to write passphrase for new secure shell key. It may be a bit confusing - you may wonder if this password must match SSH user password -
it doesn’t need to, moreover - it shouldn’t - it is different password so it should be different (you won’t need to remember it).
If you leave it blank your private key will be saved on disk unencrypted, which causes security risks.
Despite some people advice to leave it this way I don’t see any reason not to encrypt it,
that way or another you won’t need to remember it - we will use keyring for that (but it this moment save it somewhere, preferably in some password manager).
Enter strong passphrase, I recommend using some tool which will generate it (I use KeepassXC), then enter it again as confirmation.
Check created keys files
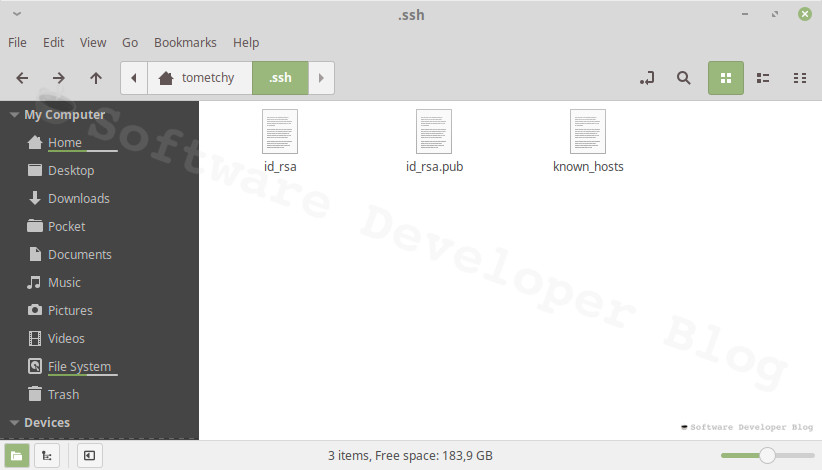
Now you should have new files in ~/.ssh directory, as described earlier - id_rsa with private key and id_rsa.pub with public key.
If you skipped encrypting private key you will see it in plain text,
otherwise it will be encrypted and will contain header which indicates encryption, for example: Proc-Type: 4,ENCRYPTED.
Send public key to server
If you decided to create key and set it up, you will now see new Window - Set Up Computer for SSH Connection.
Write your server address and a port in format server:port then your login name and press Set Up button. You will be asked for given user password.

Connect and store encryption password in keyring
If setting up succeeds, then in user directory on server will be copy of your public key in ~/.ssh directory in authorized_keys file - connect to server and check if it is there. It may look like this:
ssh-rsa AAAAB3NzaC1yc2EAAAADAQABAAABAQCxGhrhgMsQqOvXf+M1z04toa65/8vY6b+lzjAas7YJqut65o0ONWItpz2UHXSl0mFlbN49UR6VDR9jesUKW+vfuIRUaPs+8/bNEP5tIzPq3lSvw1msYNBT2kbQWO5+Qqiy7EXf/RJ7z4BGiBDEZ4rRhjxIrPAuaxeOpWU6KEDlsxCczxZWgl2xcldhk5oJwzItNd2piQlr7r2CYibHU36XtELvAhlTI1/p11rfSf/BwGtCxb25dApg8k/yRw2zpdV/JD0nfNQiESnCSmLxDr66WK5dScpXQ8zRMRSM3ekoo2ElkDEl9gQ9PhrqdKDLiPqgbobhi22ro4GKsHHAy2VF GitGitRsa
Do it as usual, just: ssh user@server.com -p 22
To see file you can for example write: cat ~/.ssh/authorized_keys
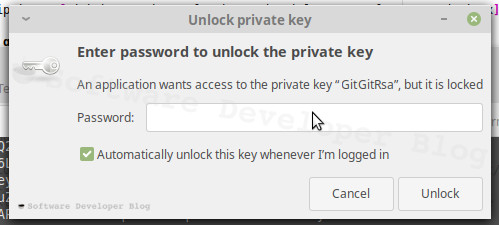
When you try to connect for the first time, you should be asked for password to Unlock private key. Set Automatically unlock this key whenever I’m logged in checkbox and since now it will be unlocked along with your login keyring, when you log in. You will no longer see this window and your private key will be encrypted - like I told, there is no reason not to encrypt it, it’s secure and convenient at the same time.
Automate SSH login using command line
In my view if Seahorse works in your case, it’s convenient to use it’s wizard, but there is one exception: when you want to use Ed25519 algorithm which, like I told earlier in this article, is more secure and gives better performance, you must use command line, as at the time of writing it’s not supported in Seahorse wizard.
Bellow steps are exact equivalent of previous from Seahorse tool, just written from command line 😺
First generate a new Ed25519 SSH key pair (if you haven’t done it already):
ssh-keygen -t ed25519 -C "description or your email"
If server which you want to reach doesn’t support Ed25519 or if you have old version of OpenSSH on your PC (Ed25519 was introduced to OpenSSH in version 6.5), use RSA instead:
ssh-keygen -t rsa -b 2048 -C "description or your email"
Description or email is optional, but it’s good to put some convenient information here, because as I described earlier, this name will be seen on server,
so it should identify you, so administrator will know who uses it.
If you wonder how many bits should have RSA key size (in above example 2048 bits), it’s the same case which I described during key creation with Seahorse tool.
The bigger number you choose, the better security you have, but it comes with a bit bigger resources usage, and with risk, that it will not work - some devices don’t support
length bigger than 2048. I recommend good article about RSA key size length,
for those who want to understand choice better.
First you will be asked about path where to save keys - use default option by hitting Enter. If you’re warned that key already exist, you must choose custom path and later set up ~/.ssh/config file.
Next you will be asked for encryption password. This is not your SSH user password, so create strong password, different than user’s one, the best option is to generate it with some tool. You won’t need to remember it, but before you configure everything, save it somewhere - the best option is to use passwords manager - I recommend KeepassXC. I described why to do that in earlier part of this article.
Now you can check created keys files to ensure everything worked as expected.
If you had to enter custom path for keys, now you should configure it:
# Only if created keys at custom path
eval $(ssh-agent -s)
ssh-add ~/.ssh/YOUR_NEW_PRIVATE_KEY
And save ~/.ssh/config file as in below example:
# Only if created keys at custom path
Host gitlab.com
  Preferredauthentications publickey
  IdentityFile ~/.ssh/GITLAB_COM_KEY

Host github.com
  Preferredauthentications publickey
  IdentityFile ~/.ssh/GITHUB_COM_KEY
Next you need to copy your public key to server, this can be done with one command:
ssh-copy-id user@server
or if ssh-copy-id utility is not available on your device, you can use plain ssh solution
(change PUBLIC_KEY.pub to what you have generated, for example id_rsa.pub):
cat ~/.ssh/PUBLIC_KEY.pub | ssh <user>@<hostname> 'cat >> .ssh/authorized_keys && echo "Key copied"'
Next check if public key is copied as expected and store encryption password in keyring.
Troubleshooting SSH key pairing
If automate connection doesn’t work and you don’t know what has failed, and you have only one remote SSH server, you may want to try everything from scratch - maybe you made some mistake? That is what helped me, but use it only if you’re sure you don’t have any other keys already and just in case copy files as backup.
- Remove all files from local ~/.ssh directory.
- Remove all files from remote (server) ~/.ssh directory.
- Try setting up everything again. I suggest reading short description how key pair automation works, to know what is happening during process.
If you see that keys are generated correctly, but copying to server failed, try to copy it manually (it may require sudo access):
- Copy public key to server, for example with scp -
scp ~/.ssh/PUBLIC_KEY.pub user@server:/home/user/PUBLIC_KEY.pub - Login to server as usual, for example:
ssh user@server.com -p 22 - Create .ssh directory, for example with command:
mkdir ~/.ssh - Append the public key content to authorized_keys file:
cat ~/PUBLIC_KEY.pub >> ~/.ssh/authorized_keys
If your key is copied to ~/.ssh/authorized_keys file on server but automate connection doesn’t work, try changing remote user permissions to 711 (some people advice to do it as well for user home directory) - you may need sudo access:
- Login to server as usual, for example:
ssh user@server.com -p 22 cd ~chmod 711 .chmod 711 .ssh/chmod 711 .ssh/authorized_keyschown -R USERANAME .ssh/
Summary
If you have any questions feel free to ask them in comments, or just to tell if this article has helped you. If you know someone who also uses SSH protocol to manage remote Git repo, don’t hesitate to send him or her link, it may help yet another person and I will be glad too :)
Stay up to date!
Get all the latest & greatest posts
delivered straight to your inbox
 Share on Facebook
 Share on Twitter