Jekyll2022-09-21T20:56:14+00:00https://www.softwaredeveloper.blog/tag/dotnetSoftware Developer Blog | Software craftsmanship and agile project managementExecuting assembly location in a Dotnet (core) single file app2022-01-19T10:00:00+00:002022-01-19T10:00:00+00:00https://www.softwaredeveloper.blog/executing-assembly-location-in-a-single-file-app<p>How to get Assembly location for modern <em>.NET</em> projects embedded in a single-file app.</p>
<h2 id="executing-assembly-location">Executing Assembly location</h2>
<p>To get executing assembly location you can invoke:</p>
<div class="language-csharp highlighter-rouge"><div class="highlight"><pre class="highlight"><code><span class="kt">var</span> <span class="n">executableDirectory</span> <span class="p">=</span> <span class="n">System</span><span class="p">.</span><span class="n">Reflection</span><span class="p">.</span><span class="n">Assembly</span><span class="p">.</span><span class="nf">GetExecutingAssembly</span><span class="p">().</span><span class="n">Location</span><span class="p">;</span>
</code></pre></div></div>
<p>But when you try to publish app as a single file, for example this way:</p>
<div class="highlighter-rouge"><div class="highlight"><pre class="highlight"><code>dotnet publish -c Release -r win-x64 --self-contained true -p:PublishSingleFile=true -p:IncludeNativeLibrariesForSelfExtract=true
</code></pre></div></div>
<p>then you will see following error:</p>
<div class="highlighter-rouge"><div class="highlight"><pre class="highlight"><code>error IL3000: 'System.Reflection.Assembly.Location' always returns an empty string for assemblies embedded in a single-file app. If the path to the app directory is needed, consider calling 'System.AppContext.BaseDirectory'
</code></pre></div></div>
<h2 id="current-directory">Current directory</h2>
<p>You can achieve similar result with <code class="highlighter-rouge">BaseDirectory</code> property from <code class="highlighter-rouge">AppContext</code> class:</p>
<div class="language-csharp highlighter-rouge"><div class="highlight"><pre class="highlight"><code><span class="kt">var</span> <span class="n">executableDirectory</span> <span class="p">=</span> <span class="n">System</span><span class="p">.</span><span class="n">AppContext</span><span class="p">.</span><span class="n">BaseDirectory</span><span class="p">;</span>
</code></pre></div></div>
<p>which will give you directory path of your single-file bundle.</p>
<p>Note that this is exactly what error message suggests, but I know that not everyone will read it to the end (maybe that’s why your here?) :)</p>
<h2 id="example-usages">Example usages</h2>
<p>You can use this path for example to set current directory:</p>
<div class="language-csharp highlighter-rouge"><div class="highlight"><pre class="highlight"><code><span class="kt">var</span> <span class="n">executableDirectory</span> <span class="p">=</span> <span class="n">AppContext</span><span class="p">.</span><span class="n">BaseDirectory</span><span class="p">;</span>
<span class="n">Directory</span><span class="p">.</span><span class="nf">SetCurrentDirectory</span><span class="p">(</span><span class="n">executableDirectory</span> <span class="p">??</span> <span class="k">throw</span> <span class="k">new</span> <span class="nf">Exception</span><span class="p">(</span><span class="s">"Could not find out executable directory"</span><span class="p">));</span>
</code></pre></div></div>
<p>Or to instruct configuration file provider without changing current directory:</p>
<div class="language-csharp highlighter-rouge"><div class="highlight"><pre class="highlight"><code><span class="kt">var</span> <span class="n">builder</span> <span class="p">=</span> <span class="n">WebApplication</span><span class="p">.</span><span class="nf">CreateBuilder</span><span class="p">(</span><span class="n">args</span><span class="p">);</span>
<span class="n">builder</span><span class="p">.</span><span class="n">Configuration</span><span class="p">.</span><span class="nf">SetBasePath</span><span class="p">(</span><span class="n">AppContext</span><span class="p">.</span><span class="n">BaseDirectory</span><span class="p">);</span>
<span class="n">builder</span><span class="p">.</span><span class="n">Configuration</span><span class="p">.</span><span class="nf">AddJsonFile</span><span class="p">(</span><span class="s">"CustomConfig.json"</span><span class="p">);</span>
</code></pre></div></div>
<p>Pay attention to lines order - setting new base path after adding json file will cause searching for json file in old base path.</p>
<h2 id="summary">Summary</h2>
<p>Retrieving application exe directory is still simple thing, but modern .NET is full of small changes which affects our lives, so I hope this short <em>how-to</em> will be helpful.</p>
<p>If in your version of .NET another approach is required, please share it with others in comment.</p>TometchyHow to get Assembly location for modern .NET projects embedded in a single-file app.Private Nuget feed in Docker .Net Core application2021-04-03T10:00:00+00:002021-04-03T10:00:00+00:00https://www.softwaredeveloper.blog/private-nuget-feed-in-docker<p>Using public <em>Nuget</em> from <a href="https://www.nuget.org/">Nuget.org</a> is always easy, you just need internet connection.
But when you need private <em>Nuget feed</em> it sometimes doesn’t want to work, especially in isolated <em>Docker container</em>.</p>
<h2 id="why-private-nuget-feed-wont-work-in-docker-without-additional-effort">Why private <em>nuget</em> feed won’t work in Docker without additional effort</h2>
<p>When you restore <em>nuget</em> packages in your Windows, then access to feed is granted
because of your credentials stored by <em>OS</em>. When you try to access private <em>nuget</em> packages in <em>Docker</em> then
your credentials are not accessible (and you wouldn’t want to use them in <em>CI/CD pipeline</em>) so you need to resolve
it some other way.</p>
<h2 id="how-to-access-private-nuget-packages-in-docker">How to access private <em>nuget</em> packages in <em>Docker</em></h2>
<p>In theory, it should be easy, it should just end up with passing proper credentials to <em>Docker</em> somehow.
In my case it was more difficult and I think similar problems are common, so I will share all steps I had to do.</p>
<h3 id="use-nuget-config-file-in-dockerfile-to-pass-credentials-to-docker">Use <em>nuget</em> config file in <em>Dockerfile</em> to pass credentials to <em>Docker</em></h3>
<p>First you have to pass <em>nuget</em> config file in <em>Dockerfile</em>.
To do so, you can use <code class="highlighter-rouge">--configfile Nuget.config</code> option in <em>dotnet publish/restore</em> commands.
This file should be stored at solution level, not to need copy-paste it for every image from solution.
Remember to set proper path (or/and copy it to convenient directory in image), otherwise you will see
error claiming that this file doesn’t exist:</p>
<div class="highlighter-rouge"><div class="highlight"><pre class="highlight"><code>/usr/share/dotnet/sdk/2.1.803/NuGet.targets(525,5): error : File '/app/Nuget.config' does not exist.
</code></pre></div></div>
<p>You can read more about <em>Nuget.config</em> file with examples and explanations in <a href="https://docs.microsoft.com/en-us/nuget/reference/nuget-config-file">official documentation</a>.</p>
<h3 id="establishing-ssl-connection-to-private-docker-feed">Establishing ssl connection to private Docker feed</h3>
<p>Next I faced error while trying to establish encrypted connection to my Azure DevOps server <em>nuget feed</em>.</p>
<p>It was something like this:</p>
<div class="highlighter-rouge"><div class="highlight"><pre class="highlight"><code>System.Net.Http.HttpRequestException: The SSL connection could not be established, see inner exception.
---> System.Security.Authentication.AuthenticationException: Authentication failed, see inner exception.
---> System.ComponentModel.Win32Exception: The client and server cannot communicate, because they do not possess a common algorithm
--- End of inner exception stack trace ---
at System.Net.Security.SslState.StartSendAuthResetSignal(ProtocolToken message, AsyncProtocolRequest asyncRequest, ExceptionDispatchInfo exception)
at System.Net.Security.SslState.CheckCompletionBeforeNextReceive(ProtocolToken message, AsyncProtocolRequest asyncRequest)
at System.Net.Security.SslState.StartSendBlob(Byte[] incoming, Int32 count, AsyncProtocolRequest asyncRequest)
at System.Net.Security.SslState.ProcessReceivedBlob(Byte[] buffer, Int32 count, AsyncProtocolRequest asyncRequest)
at System.Net.Security.SslState.StartReadFrame(Byte[] buffer, Int32 readBytes, AsyncProtocolRequest asyncRequest)
at System.Net.Security.SslState.PartialFrameCallback(AsyncProtocolRequest asyncRequest)
</code></pre></div></div>
<p>I solved this one by adding <code class="highlighter-rouge">DOTNET_SYSTEM_NET_HTTP_USESOCKETSHTTPHANDLER=0</code> before using dotnet publish, like this:</p>
<div class="language-dockerfile highlighter-rouge"><div class="highlight"><pre class="highlight"><code><span class="k">RUN </span><span class="nv">DOTNET_SYSTEM_NET_HTTP_USESOCKETSHTTPHANDLER</span><span class="o">=</span>0 dotnet publish project <span class="nt">-c</span> Release <span class="nt">--configfile</span> Nuget.config
</code></pre></div></div>
<h3 id="still-not-able-to-authenticate---response-status-code-does-not-indicate-success-401-unauthorized">Still not able to authenticate - Response status code does not indicate success: 401 (Unauthorized)</h3>
<p>After doing above steps I still faced issue while trying to use this <em>nuget feed</em>.
I knew that credentials I used were corrected, the account which I used was created especially for <em>nuget</em> purposes
and I knew that it had all proper permissions set and still was not able to connect. Error said:</p>
<div class="highlighter-rouge"><div class="highlight"><pre class="highlight"><code>/usr/share/dotnet/sdk/2.1.803/NuGet.targets(123,5): error : Unable to load the service index for source http://myazuredevopsserver:8080/tfs/DefaultCollection/_packaging/PackageFeed/nuget/v3/index.json. [/app/App.csproj]
/usr/share/dotnet/sdk/2.1.803/NuGet.targets(123,5): error : Response status code does not indicate success: 401 (Unauthorized). [/app/App.csproj]
The command '/bin/sh -c DOTNET_SYSTEM_NET_HTTP_USESOCKETSHTTPHANDLER=0 dotnet restore App --configfile Nuget.config' returned a non-zero code: 1
</code></pre></div></div>
<p>Azure DevOps server admin didn’t know why and couldn’t read it from server logs so suggested trying another
approach, which by the way may be good for security - using <a href="https://docs.microsoft.com/en-us/azure/devops/organizations/accounts/use-personal-access-tokens-to-authenticate?view=azure-devops&tabs=preview-page">authentication with PAT (personal access token)</a>.
He generated such a token, and we passed this token to <em>Nuget.config</em> file and feed finally started to work.
Now it looks like this:</p>
<div class="highlighter-rouge"><div class="highlight"><pre class="highlight"><code><span class="cp"><?xml version="1.0" encoding="utf-8"?></span>
<span class="nt"><configuration></span>
<span class="nt"><config></span>
<span class="nt"><add</span> <span class="na">key=</span><span class="s">"http_proxy"</span> <span class="na">value=</span><span class="s">"http://myazuredevopsserver:8080@company.corp"</span> <span class="nt">/></span>
<span class="nt"></config></span>
<span class="nt"><packageSources></span>
<span class="nt"><clear</span> <span class="nt">/></span>
<span class="nt"><add</span> <span class="na">key=</span><span class="s">"nuget.org"</span> <span class="na">value=</span><span class="s">"https://api.nuget.org/v3/index.json"</span> <span class="nt">/></span>
<span class="nt"><add</span> <span class="na">key=</span><span class="s">"Internal"</span> <span class="na">value=</span><span class="s">"http://myazuredevopsserver:8080/tfs/DefaultCollection/_packaging/CompanyPackageFeed/nuget/v3/index.json"</span> <span class="nt">/></span>
<span class="nt"></packageSources></span>
<span class="nt"><activePackageSource></span>
<span class="nt"><add</span> <span class="na">key=</span><span class="s">"All"</span> <span class="na">value=</span><span class="s">"(Aggregate source)"</span> <span class="nt">/></span>
<span class="nt"></activePackageSource></span>
<span class="nt"><packageSourceCredentials></span>
<span class="nt"><Internal></span>
<span class="nt"><add</span> <span class="na">key=</span><span class="s">"Username"</span> <span class="na">value=</span><span class="s">"xxx"</span> <span class="nt">/></span>
<span class="nt"><add</span> <span class="na">key=</span><span class="s">"ClearTextPassword"</span> <span class="na">value=</span><span class="s">"xxx"</span> <span class="nt">/></span>
<span class="nt"><add</span> <span class="na">key=</span><span class="s">"ValidAuthenticationTypes"</span> <span class="na">value=</span><span class="s">"basic"</span> <span class="nt">/></span>
<span class="nt"></Internal></span>
<span class="nt"></packageSourceCredentials></span>
<span class="nt"></configuration></span>
</code></pre></div></div>
<p>Where <em>xxx</em> is the token (exactly the same value passed both to <em>Username</em> and <em>ClearTextPassword</em> field).
Note that (as far as I know) this token can be generated max for 1 year, so better set some reminder in your calendar, or red builds in build server will remind it for you after a year :)</p>
<h3 id="local-nuget-feed-as-a-last-resort">Local <em>Nuget feed</em> as a last resort</h3>
<p>For a while till I didn’t get this working I created <a href="https://docs.microsoft.com/en-us/nuget/hosting-packages/local-feeds">local Nuget feed</a>, to have some workaround until
I figured out proper solution.
With local feed you can store <em>Nugets</em> in local directory and commit it to repo. But of course you need to maintain
it by yourself, manually or with some automation which will commit new <em>Nuget</em> versions for you, so I don’t recommend it
until it’s really the only way to get job done.<br />
There are articles on the internet how to set it up, I will
just show you screenshot of how it looked in my case (it’s actually screenshot from commit which removed it from my project):
<img src="/assets/images/local-nuget-feed.jpg" alt="Screenshot showing Nuget.config file with local Nuget feed" title="Nuget.config file with local Nuget feed" /></p>
<h2 id="summary">Summary</h2>
<p>I must admit that this problem ate much of my time, moreover I had to ask Azure DevOps server admin
for help with reading server logs, and trying to figure out how to solve it.
I didn’t have time to write this post earlier, but questions about private feed were common in my inbox,
so I know that many of you face similar issues.</p>
<p>If your case is yet different, feel free to ask question in comment.
And of course feedback is welcome, if this article has helped you or is missing something, it is very valuable for me to know it :)</p>TometchyUsing public Nuget from Nuget.org is always easy, you just need internet connection. But when you need private Nuget feed it sometimes doesn’t want to work, especially in isolated Docker container.Optimize Docker .NET Core project and docker-compose solution to reduce build image timehttps://www.softwaredeveloper.blog/assets/images/docker-optimize.jpghttps://www.softwaredeveloper.blog/assets/images/docker-optimize.jpgOptimize Docker .NET Core project and docker-compose solution to reduce build image time
https://www.softwaredeveloper.blog/optimize-building-net-core-docker-image
2020-03-20T14:00:00+00:002020-06-12T20:00:00+00:00https://www.softwaredeveloper.blog/optimize-building-net-core-docker-image<p><em>Docker</em> has built in great cache mechanism, but to be able to use it, you have to understand how it works.
Let’s dive into it, to build <em>.NET Core Docker</em> images faster.</p>
<h2 id="how-docker-cache-works">How Docker cache works</h2>
<p>First we should understand how <em>Docker</em> cache works. This part is described nice in <a href="https://docs.docker.com/develop/develop-images/dockerfile_best-practices/#leverage-build-cache">official documentation</a>:</p>
<blockquote>
<ul>
<li>Starting with a base image that is already in the cache, the next instruction is compared against all child images derived from that base image to see if one of them was built using the exact same instruction. If not, the cache is invalidated.</li>
<li>In most cases simply comparing the instruction in the <code class="highlighter-rouge">Dockerfile</code> with one of the child images is sufficient. However, certain instructions require a little more examination and explanation.</li>
<li>For the <code class="highlighter-rouge">ADD</code> and <code class="highlighter-rouge">COPY</code> instructions, the contents of the file(s) in the image are examined and a checksum is calculated for each file. The last-modified and last-accessed times of the file(s) are not considered in these checksums. During the cache lookup, the checksum is compared against the checksum in the existing images. If anything has changed in the file(s), such as the contents and metadata, then the cache is invalidated.</li>
<li>Aside from the <code class="highlighter-rouge">ADD</code> and <code class="highlighter-rouge">COPY</code> commands, cache checking will not look at the files in the container to determine a cache match. For example, when processing a <code class="highlighter-rouge">RUN apt-get -y update</code> command the files updated in the container will not be examined to determine if a cache hit exists. In that case just the command string itself will be used to find a match.</li>
</ul>
<p>Once the cache is invalidated, all subsequent <code class="highlighter-rouge">Dockerfile</code> commands will generate new images and the cache will not be used.</p>
</blockquote>
<p>So it always checks if given instruction is started in exactly the same situation as in the past.
If it is, it doesn’t start it, but this layer is taken from cache.
If there is even <em>one bit</em> changed, for example one copied file differs, then cache is invalidated and instruction is invoked <em>truly</em>.</p>
<h2 id="how-to-decrease-image-build-time">How to decrease image build time</h2>
<p>To build images faster, put everything which will rarely change, above things which change often.
For example, when you compile your application inside <em>Dockerfile</em>, then your source files often change, which invalidates cache all the way down.
But you probably download some dependencies, for example <em>Nuget</em> packages, which change
less often than source code, so you can put it before compilation. This way as long as you stick to existing dependencies, they are taken from cache.
When you add some new dependency or change version of existing one, cache is invalidated and packages are downloaded from the Internet (and new cache is created).</p>
<h3 id="ignore-what-you-dont-need">Ignore what you don’t need</h3>
<p>When you copy files from host to <em>build context</em>, Docker calculates checksum for them. If exactly the same files were copied to exactly
the same directory in Docker image, then this layer (as every operation in Dockerfile creates new layer) is taken from cache.
So copy only those files which you need, because you can invalidate cache in vain, with files which are not required in your image, for example
every <code class="highlighter-rouge">Dockerfile</code>, or files generated by your IDE and so on.
Remember, that <em>.dockerignore</em> file has to be located in <em>build context</em> root. Example rules:</p>
<div class="highlighter-rouge"><div class="highlight"><pre class="highlight"><code>*/bin
*/obj
.dockerignore // Docker files
.env
.git // Git files
.gitignore // Git files
.gitattributes // Git files
.vs // IDE files
.vscode // IDE files
**/.toolstarget
.idea // IDE files
**/Samples // Additional files
build
Docker // Docker scripts and docker-compose files (in this example in 'Docker' directory, in context root level)
**/Dockerfile // Docker files
**/docker-compose // Docker files
*Test*
</code></pre></div></div>
<h3 id="try-to-create-your-own-cache-yarn-build-example">Try to create your own cache (yarn build example)</h3>
<p>When you know where is your bottleneck and there is no obvious way to reduce it, try to figure out some none obvious solution.
For example a few projects in one of products which I maintain, have <code class="highlighter-rouge">yarn install</code> and <code class="highlighter-rouge">yarn build</code> sewn into <em>csproj</em> file, like this:</p>
<div class="highlighter-rouge"><div class="highlight"><pre class="highlight"><code><Target Name="PublishRunWebpack" AfterTargets="ComputeFilesToPublish" >
<Exec WorkingDirectory="$(SpaRoot)" Command="yarn install" />
<Exec WorkingDirectory="$(SpaRoot)" Command="yarn build" />
</code></pre></div></div>
<p>but this was extremely slow - it took (in <em>Docker for Windows</em>) around 4 minutes.
And web files in those projects were changed rarely, usually C# code got changed, so I wanted to reuse <em>yarn</em> build results. I didn’t find a way to use <em>npm</em>/<em>yarn</em> cache in this situation, so I
cached it myself. I moved copying web files to the top of Dockerfile, like this:</p>
<div class="language-dockerfile highlighter-rouge"><div class="highlight"><pre class="highlight"><code><span class="k">WORKDIR</span><span class="s"> /app/WebClient/WebFiles</span>
<span class="k">COPY</span><span class="s"> WebClient/WebFiles . # Taken form cache as long as you don't change files in WebFiles directory</span>
<span class="k">RUN </span>yarn install <span class="c"># Taken form cache as long as you don't change files in WebFiles directory</span>
<span class="k">RUN </span>yarn build <span class="c"># Taken form cache as long as you don't change files in WebFiles directory</span>
</code></pre></div></div>
<p>and changed <em>csproj</em> like this:</p>
<div class="highlighter-rouge"><div class="highlight"><pre class="highlight"><code><Target Name="PublishRunWebpack" AfterTargets="ComputeFilesToPublish" Condition=" '$(Configuration)' == 'Release' And !Exists('$(ProjectDir)WebFiles/build') ">
<Exec WorkingDirectory="$(SpaRoot)" Command="yarn install" />
<Exec WorkingDirectory="$(SpaRoot)" Command="yarn build" />
</code></pre></div></div>
<p>So Docker cached <em>yarn</em> build output and it was invalidated only when web files changed. With target condition, C# project reused already existing <em>yarn</em> build output.
Of course, because <code class="highlighter-rouge">COPY WebClient/WebFiles</code> was on top of my Dockerfile, every time when some web files changed, it invalidated cache all the way down,
so if it was changed often, I would do it some different way, but in my case it worked as expected.
And I know that in theory incorrect build directory could exist somehow, but it’s only theory, because in <em>Docker</em> situation is repeatable and on
developer machines publish wasn’t invoked that way or another, only debug configuration, so in practice it’s not a risk. Maybe with <a href="http://www.digitallycreated.net/Blog/67/incremental-builds-in-msbuild-and-how-to-avoid-breaking-them">incremental build</a> I could be able to achieve the same with a bit cleaner way - if your case is similar to mine, you can try it.</p>
<h3 id="reuse-what-you-can">Reuse what you can</h3>
<p>If there is something which you can reuse, do it.
For example when I have multiple <em>Docker</em> images in one solution, I build them all at once, instead of building every project in separation.
I have observed, that this way it’s faster. For example, I have solution <em>Application.sln</em> which contains 5 executable projects (which are packed to separate <em>Docker</em> images)
and additional projects like tests, usage samples and so on. So to lower number of projects to build, I have copied it to <em>Application-minimal.sln</em> and left only necessary projects.
Then in every <em>Dockerfile</em>, instead of compiling only one, chosen project, like this: <code class="highlighter-rouge">RUN dotnet publish PROJECT_NAME -c Release -o out</code>
I compile whole solution like this: <code class="highlighter-rouge">RUN dotnet publish Application-minimal.sln -c Release</code>. After compilation, I copy whole build output (with all projects)
to final image (see <a href="https://www.softwaredeveloper.blog/multi-project-dotnet-core-solution-in-docker-image#docker-multi-stage-build"><em>Docker</em> multi-stage build explained</a>),
for example this way: <code class="highlighter-rouge">COPY --from=build-env /app/build .</code>. Finally, at the very bottom of <em>Dockerfile</em> I invalidate cache specifying which project I want to run:</p>
<div class="language-dockerfile highlighter-rouge"><div class="highlight"><pre class="highlight"><code><span class="k">WORKDIR</span><span class="s"> /app/ProjectA/publish # Pay attention to have correct path, especially if you set custom build output path.</span>
<span class="k">ENTRYPOINT</span><span class="s"> ["dotnet", "ProjectA.dll"]</span>
</code></pre></div></div>
<p>Everything above is reused from cache, so when you want to build <em>n</em> projects, only first project takes a while to compile, other projects are taken from cache practically whole.
In my case I’ve observed that it works faster than doing it in separation (running <code class="highlighter-rouge">dotnet publish PROJECTX</code> for every project). It will probably be faster in your case too, but as with every optimization,
I encourage to measure it before applying :)</p>
<h3 id="experiment-with-caching-nuget-dependencies">Experiment with caching nuget dependencies</h3>
<p>In your developer PC, you have nuget cached locally. But in <em>Docker</em> you have clean situation every time you invoke build, so nuget packages are taken from the internet every time, so it’s good to cache them,
because we don’t change project dependencies as often as project source files.
When you compile only one project, then situation is clear, from project directory you can run:</p>
<div class="language-dockerfile highlighter-rouge"><div class="highlight"><pre class="highlight"><code><span class="k">COPY</span><span class="s"> *.csproj ./ # Taken form cache as long as you don't change your project file</span>
<span class="k">RUN </span>dotnet restore <span class="c"># Taken form cache as long as you don't change your project file </span>
<span class="c"># Copy everything else and build</span>
<span class="k">COPY</span><span class="s"> . ./</span>
<span class="k">RUN </span>dotnet publish <span class="nt">-c</span> Release <span class="nt">-o</span> out
</code></pre></div></div>
<p>But when you want to restore files for <a href="#reuse-what-you-can">whole solution</a>, then it gets more complicated, because (at the time of writing) you cannot point
to <em>.sln</em> file in <code class="highlighter-rouge">dotnet restore</code> command, and you cannot point to multiple <em>csproj</em> files neither.
Fortunately, you can resolve it in many ways, for example with simple bash script:</p>
<div class="language-bash highlighter-rouge"><div class="highlight"><pre class="highlight"><code><span class="c">#!/bin/bash</span>
<span class="k">for </span>projectName <span class="k">in</span> <span class="k">*</span>.csproj<span class="p">;</span> <span class="k">do</span> <span class="c"># It can be saved as one-linear straight in Dockerfile</span>
dotnet restore <span class="nv">$projectName</span>
<span class="k">done</span>
</code></pre></div></div>
<p>used this way:</p>
<div class="language-dockerfile highlighter-rouge"><div class="highlight"><pre class="highlight"><code><span class="k">COPY</span><span class="s"> restore-all.sh . # Taken form cache always</span>
<span class="k">RUN </span>chmod +x restore-all.sh
<span class="k">COPY</span><span class="s"> */*.csproj ./ # Taken form cache as long as you don't change your csproj files</span>
<span class="k">RUN </span>./restore-all.sh <span class="c"># Taken form cache as long as you don't change your csproj files</span>
</code></pre></div></div>
<h3 id="alternatively-build-image-from-dedicated-container">Alternatively: build image from dedicated container</h3>
<p>Some people do not compile application in <em>Dockerfile</em>, but on their own PC and just put build output to image.
This is faster, but it has one big downside: you’re not 100% sure that image is properly built, and generally speaking
how it was made, so I’ll never wont to put such image on production. But I’ve also heard about another solution - to create
container dedicated to create <em>input</em> to <em>Docker</em> image… Sounds a bit like overengineering, and probably in many cases it is, but maybe
sometimes it’s worth doing it. You have more options in container, for example you can mount directories, so there is no problem with any cache you need.
You can even use already existing cache from host machine. I’ve never tried such approach, above methods work well
for me, but maybe sometimes it’s worth to organize <em>CI/CD pipeline</em> this way.</p>
<h2 id="summary">Summary</h2>
<p>Proper caching in <em>Dockerfile</em> is quite broad subject, so here I only touched it in generals. The point of this article
is not only to give you some ready to use tricks (like those with <em>yarn</em> or <em>Nuget</em> packages), but also to show you how cache in <em>Docker</em> works and encourage you to investigate your own situation.
Pay attention to every build layer, measure which step takes too much time and where is your bottleneck.
Sometimes with one line moved in <em>Dockerfile</em>, or one file added to <em>.dockerignore</em> you can make (really) big difference.
And sometimes with small investigation you can resolve huge problem, for example <em>.dockerignore</em> file stored somewhere else than build context root directory.<br />
If you have feeling that cache caused some problem (which in theory may be the case, but I never had such situation) you can always check
how <em>Docker</em> builds with <code class="highlighter-rouge">no-cache</code> parameter, which forces to build everything from scratch.</p>
<p>I hope the article was helpful for you, please publish it on Facebook or Twitter and of course ask me anything, which is still not clear.
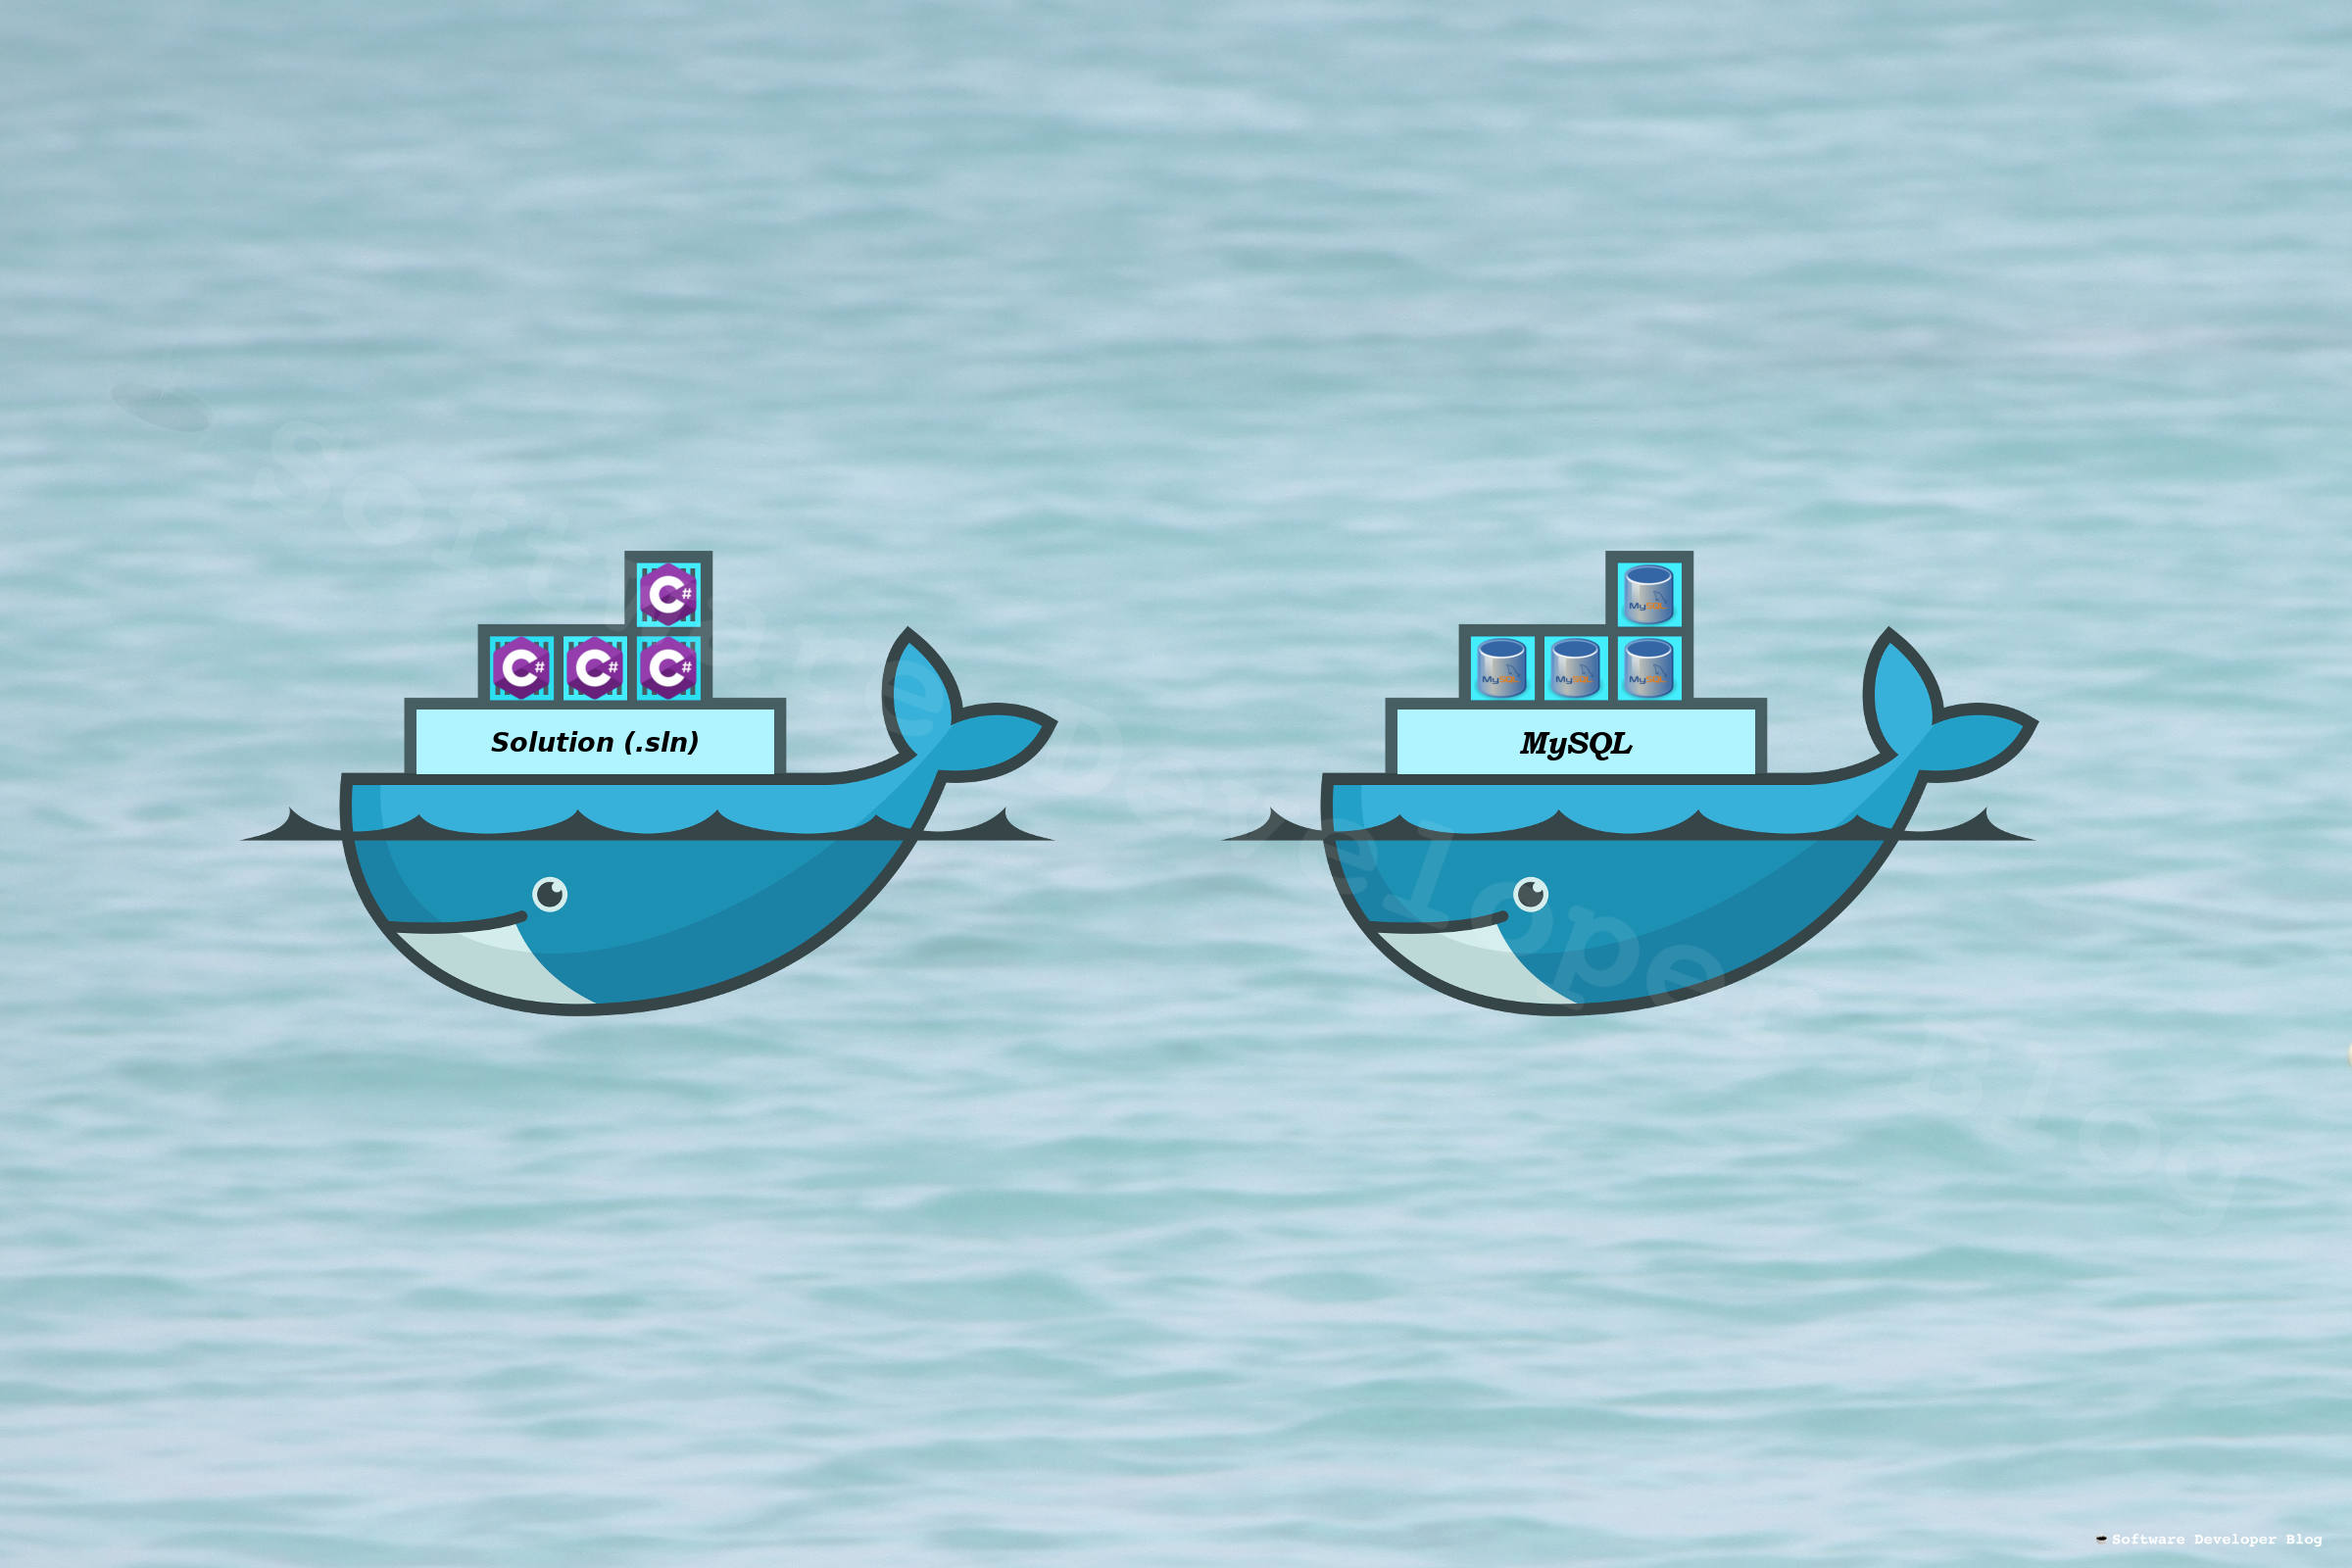
If you know some other trick related to cache, please share it through comments, someone for sure will appreciate it :)</p>TometchyDocker has built in great cache mechanism, but to be able to use it, you have to understand how it works. Let’s dive into it, to build .NET Core Docker images faster.Docker compose introduction - Dotnet core app composed with MySQL Databasehttps://www.softwaredeveloper.blog/assets/images/docker-compose-dotnet-core-with-mysql.jpghttps://www.softwaredeveloper.blog/assets/images/docker-compose-dotnet-core-with-mysql.jpgDocker compose introduction - Dotnet core app composed with MySQL Database
https://www.softwaredeveloper.blog/docker-compose-introduction-dotnet-core-app-composed-with-mysql-database
2019-09-13T06:00:00+00:002019-09-13T06:00:00+00:00https://www.softwaredeveloper.blog/docker-compose-introduction-dotnet-core-app-composed-with-mysql-database<p>Introduction to docker-compose - basic aspects explained with .NET Core app and MySQL DB composed together.</p>
<p>If you are familiar with <a href="https://www.softwaredeveloper.blog/multi-project-dotnet-core-solution-in-docker-image">basics of creating Docker images</a>, now
it’s time to learn how to compose more than one Docker container together. Once again we’ll learn with .NET Core 2.2 example app, but
you should be able to understand Docker compose concepts here, even if you’re not familiar with C# language.</p>
<p>Whole solution is available in <a href="https://github.com/SoftwareDeveloperBlog/Docker-compose-dotnet-core-and-mysql">SoftwareDeveloperBlog repo on GitHub</a>.</p>
<h2 id="docker-compose-file">Docker-compose file</h2>
<p>Heart of Docker composing is one text file (in <em>yaml</em> format).<br />
By default it’s named <em>docker-compose.yml</em> (or <em>docker-compose.yaml</em> if you prefer),
but unlike <em>Dockerfile</em> this name can be changed and specified as command parameter.</p>
<h3 id="where-to-keep-docker-compose-file">Where to keep docker-compose file?</h3>
<p><strong>Short answer</strong> - it doesn’t matter, put it where it’s convenient for you.<br />
<strong>Long answer</strong> - some people advice to put it along with deployment scripts, for example in your CI pipeline, because composing is strictly
related with deploying. Moreover, this way you can compose images from different repositories.<br />
<strong>Where I put <em>docker-compose.yml</em> file?</strong> So far I’ve never containerized system spread across multiple repositories, so I put it along with sources, to
have it under version control, next to solution file (<em>.sln</em>) - to <em>manage</em> it from the <em>highest perspective</em> (above project directories).
Usually I also create solution directory called <em>Docker</em>, referencing docker-compose and <em>.dockerignore</em> files, to be able to edit it from my IDE.</p>
<h3 id="docker-compose-file-example">Docker-compose file example</h3>
<p>In our example we will use following <em>docker-compose.yml</em> file, <a href="#where-to-keep-docker-compose-file">kept as I usually do</a>, next to solution file:</p>
<figure class="highlight"><pre><code class="language-yaml" data-lang="yaml"><span class="na">version</span><span class="pi">:</span> <span class="s1">'</span><span class="s">3'</span>
<span class="na">services</span><span class="pi">:</span>
<span class="na">db</span><span class="pi">:</span>
<span class="na">build</span><span class="pi">:</span> <span class="s">./Db</span>
<span class="na">app</span><span class="pi">:</span>
<span class="na">build</span><span class="pi">:</span>
<span class="na">context</span><span class="pi">:</span> <span class="s">.</span>
<span class="na">dockerfile</span><span class="pi">:</span> <span class="s">Aspnetcoreapp/Dockerfile</span>
<span class="na">ports</span><span class="pi">:</span>
<span class="pi">-</span> <span class="s">8080:80</span>
<span class="na">depends_on</span><span class="pi">:</span>
<span class="pi">-</span> <span class="s">db</span></code></pre></figure>
<p>First we specify docker-compose file <strong>format version</strong>. I just took the newest version, I don’t see any reasons to take older ones
while creating new system.</p>
<p>Then we specify our <strong>services</strong>. We could specify other aspects, for example networks, volumes, configs,
but it’s too wide for this introduction.</p>
<p>Every service has its name, and this <strong>service name is important</strong>, because we will use it to resolve container ip address and to refer it from other service (for example to specify dependencies).</p>
<p><strong>Build parameter</strong> can just point to directory with Dockerfile (like in <em>db</em> service in example above) - then this directory is also taken as build context.
If you want to use different directory for build context, than the one with Dockerfile inside, you can separate <em>context</em> and <em>dockerfile</em> options, like in <em>app</em> service above.
If you wonder why to do that, I explained <a href="https://www.softwaredeveloper.blog/multi-project-dotnet-core-solution-in-docker-image">choosing build context in previous post</a>.</p>
<p>Specify <strong>ports</strong> to bind port inside container with one from host machine, like in usual <a href="https://www.softwaredeveloper.blog/multi-project-dotnet-core-solution-in-docker-image#docker-run-command"><em>Docker run</em> command</a>.</p>
<p>Lastly we specify that our app <strong>depends on</strong> db, with <em>depends_on</em> option, taking service name as value. This way we determine services start and stop order (and few other things, not mentioned here for simplification).</p>
<h2 id="docker-compose-commands">Docker-compose commands</h2>
<p>Managing composed system is easy, you don’t need to remember many commands and parameters.</p>
<h3 id="docker-compose-up">Docker-compose up</h3>
<p>From directory with <em>docker-compose.yml</em> file you can just run <code class="highlighter-rouge">docker-compose up</code> command.
It will run containers in order forced by <em>depends_on</em> configuration (if specified).
By default images are build only when you run <em>docker-compose up</em> command for the first time, so if you have changed something, you should
extend it with <code class="highlighter-rouge">--build</code> parameter.
If you want to run it from different location then the one with <em>docker-compose.yml</em> file, or if you named compose file not default way, or if you want to pass more than one compose file at once, pass <code class="highlighter-rouge">-f FILE_PATH</code> parameter.
Last parameter which I use often is <code class="highlighter-rouge">-d</code> to detach console from containers.
There are other commands to start composed containers, but usually we use this one, so I don’t mention them in this introduction. If you’re curious, they are
described well <a href="https://docs.docker.com/compose/faq/#whats-the-difference-between-up-run-and-start">in official documentation</a>.
Usually I run <em>docker-compose up</em> command this way:</p>
<div class="language-bash highlighter-rouge"><div class="highlight"><pre class="highlight"><code>docker-compose up <span class="nt">-d</span> <span class="nt">--build</span>
</code></pre></div></div>
<h3 id="docker-compose-down">Docker-compose down</h3>
<p>If you want to stop composed containers, remove them and theirs networks, just type <code class="highlighter-rouge">docker-compose down</code> from directory with <em>docker-compose.yml</em> file.
If you want just stop containers without cleaning everything, use <code class="highlighter-rouge">docker-compose stop</code> command.
Note, that if you have stopped containers with <em>CTRL+C</em> shortcut in attached terminal, you didn’t clean stuff, you just stopped containers and finally will need to run <em>docker-compose down</em> as usual.</p>
<h2 id="example-system">Example system</h2>
<p>Now with mandatory knowledge, lets create example system.
As mentioned in <a href="#introduction">introduction</a>, whole repo is available <a href="https://github.com/SoftwareDeveloperBlog/Docker-compose-dotnet-core-and-mysql">on GitHub</a>.</p>
<h3 id="net-core-app">.NET Core app</h3>
<p>First we create simple ASP.NET Core application.
Small startup configuration:</p>
<div class="language-csharp highlighter-rouge"><div class="highlight"><pre class="highlight"><code><span class="k">public</span> <span class="k">class</span> <span class="nc">Startup</span>
<span class="p">{</span>
<span class="k">public</span> <span class="nf">Startup</span><span class="p">(</span><span class="n">IConfiguration</span> <span class="n">configuration</span><span class="p">)</span> <span class="p">=></span> <span class="n">Configuration</span> <span class="p">=</span> <span class="n">configuration</span><span class="p">;</span>
<span class="k">public</span> <span class="n">IConfiguration</span> <span class="n">Configuration</span> <span class="p">{</span> <span class="k">get</span><span class="p">;</span> <span class="p">}</span>
<span class="k">public</span> <span class="k">void</span> <span class="nf">ConfigureServices</span><span class="p">(</span><span class="n">IServiceCollection</span> <span class="n">services</span><span class="p">)</span>
<span class="p">{</span>
<span class="n">services</span><span class="p">.</span><span class="nf">AddMvc</span><span class="p">().</span><span class="nf">SetCompatibilityVersion</span><span class="p">(</span><span class="n">CompatibilityVersion</span><span class="p">.</span><span class="n">Version_2_2</span><span class="p">);</span>
<span class="p">}</span>
<span class="k">public</span> <span class="k">void</span> <span class="nf">Configure</span><span class="p">(</span><span class="n">IApplicationBuilder</span> <span class="n">app</span><span class="p">,</span> <span class="n">IHostingEnvironment</span> <span class="n">env</span><span class="p">)</span>
<span class="p">{</span>
<span class="k">if</span> <span class="p">(</span><span class="n">env</span><span class="p">.</span><span class="nf">IsDevelopment</span><span class="p">())</span>
<span class="n">app</span><span class="p">.</span><span class="nf">UseDeveloperExceptionPage</span><span class="p">();</span>
<span class="n">app</span><span class="p">.</span><span class="nf">UseMvc</span><span class="p">();</span>
<span class="p">}</span>
<span class="p">}</span>
</code></pre></div></div>
<p>Program entry point:</p>
<div class="language-csharp highlighter-rouge"><div class="highlight"><pre class="highlight"><code><span class="k">public</span> <span class="k">static</span> <span class="k">class</span> <span class="nc">Program</span>
<span class="p">{</span>
<span class="k">public</span> <span class="k">static</span> <span class="k">void</span> <span class="nf">Main</span><span class="p">(</span><span class="kt">string</span><span class="p">[]</span> <span class="n">args</span><span class="p">)</span>
<span class="p">{</span>
<span class="nf">CreateWebHostBuilder</span><span class="p">(</span><span class="n">args</span><span class="p">).</span><span class="nf">Build</span><span class="p">().</span><span class="nf">Run</span><span class="p">();</span>
<span class="p">}</span>
<span class="k">public</span> <span class="k">static</span> <span class="n">IWebHostBuilder</span> <span class="nf">CreateWebHostBuilder</span><span class="p">(</span><span class="kt">string</span><span class="p">[]</span> <span class="n">args</span><span class="p">)</span> <span class="p">=></span>
<span class="n">WebHost</span><span class="p">.</span><span class="nf">CreateDefaultBuilder</span><span class="p">(</span><span class="n">args</span><span class="p">)</span>
<span class="p">.</span><span class="n">UseStartup</span><span class="p"><</span><span class="n">Startup</span><span class="p">>();</span>
<span class="p">}</span>
</code></pre></div></div>
<p>Controller with one <em>GET</em> method:</p>
<div class="language-csharp highlighter-rouge"><div class="highlight"><pre class="highlight"><code><span class="na">[Route("")]</span>
<span class="k">public</span> <span class="k">class</span> <span class="nc">ProductsController</span> <span class="p">:</span> <span class="n">ControllerBase</span>
<span class="p">{</span>
<span class="k">private</span> <span class="k">readonly</span> <span class="n">ProductsProvider</span> <span class="n">_provider</span> <span class="p">=</span> <span class="k">new</span> <span class="nf">ProductsProvider</span><span class="p">();</span>
<span class="p">[</span><span class="n">HttpGet</span><span class="p">]</span>
<span class="k">public</span> <span class="n">ActionResult</span><span class="p"><</span><span class="n">IEnumerable</span><span class="p"><</span><span class="n">Product</span><span class="p">>></span> <span class="nf">Get</span><span class="p">()</span>
<span class="p">{</span>
<span class="k">try</span>
<span class="p">{</span>
<span class="k">return</span> <span class="n">_provider</span><span class="p">.</span><span class="nf">GetAll</span><span class="p">();</span>
<span class="p">}</span>
<span class="k">catch</span> <span class="p">(</span><span class="n">Exception</span> <span class="n">e</span><span class="p">)</span>
<span class="p">{</span>
<span class="n">Console</span><span class="p">.</span><span class="nf">WriteLine</span><span class="p">(</span><span class="s">"Exception during providing products, maybe DB is not fully initialized yet? "</span> <span class="p">+</span>
<span class="s">$"Try again in a few minutes and if it doesn't help, check your docker-compose configuration.\n</span><span class="p">{</span><span class="n">e</span><span class="p">}</span><span class="s">"</span><span class="p">);</span>
<span class="k">return</span> <span class="k">new</span> <span class="n">Product</span><span class="p">[</span><span class="m">0</span><span class="p">];</span>
<span class="p">}</span>
<span class="p">}</span>
<span class="p">}</span>
</code></pre></div></div>
<p>Controller is coupled with <em>Product</em> type:</p>
<div class="language-csharp highlighter-rouge"><div class="highlight"><pre class="highlight"><code><span class="k">public</span> <span class="k">class</span> <span class="nc">Product</span>
<span class="p">{</span>
<span class="k">public</span> <span class="kt">int</span> <span class="n">Id</span> <span class="p">{</span> <span class="k">get</span><span class="p">;</span> <span class="p">}</span>
<span class="k">public</span> <span class="kt">string</span> <span class="n">Name</span> <span class="p">{</span> <span class="k">get</span><span class="p">;</span> <span class="p">}</span>
<span class="k">public</span> <span class="kt">string</span> <span class="n">Description</span> <span class="p">{</span> <span class="k">get</span><span class="p">;</span> <span class="p">}</span>
<span class="k">public</span> <span class="nf">Product</span><span class="p">(</span><span class="kt">int</span> <span class="n">id</span><span class="p">,</span> <span class="kt">string</span> <span class="n">name</span><span class="p">,</span> <span class="kt">string</span> <span class="n">description</span><span class="p">)</span>
<span class="p">{</span>
<span class="n">Id</span> <span class="p">=</span> <span class="n">id</span><span class="p">;</span>
<span class="n">Name</span> <span class="p">=</span> <span class="n">name</span><span class="p">;</span>
<span class="n">Description</span> <span class="p">=</span> <span class="n">description</span><span class="p">;</span>
<span class="p">}</span>
<span class="p">}</span>
</code></pre></div></div>
<p>Controller is also coupled with <em>ProductsProvider</em> class, which uses <em>Dapper</em> to access MySQL DB.
Note, that we <strong>provide docker-compose service name as DB address</strong> (as <a href="#docker-compose-file-example">mentioned earlier</a> - that’s why service name is important). Be careful not to make typo - <strong>service name is case-sensitive</strong>.</p>
<div class="language-csharp highlighter-rouge"><div class="highlight"><pre class="highlight"><code><span class="k">public</span> <span class="k">class</span> <span class="nc">ProductsProvider</span>
<span class="p">{</span>
<span class="k">private</span> <span class="k">const</span> <span class="kt">string</span> <span class="n">CONN_STRING</span> <span class="p">=</span> <span class="s">"Server=db;Port=3306;Database=product-db;Uid=root; Pwd=myPass;"</span><span class="p">;</span>
<span class="k">private</span> <span class="k">const</span> <span class="kt">string</span> <span class="n">QUERY</span> <span class="p">=</span> <span class="s">"SELECT Id, Name, Description FROM product"</span><span class="p">;</span>
<span class="k">public</span> <span class="n">Product</span><span class="p">[]</span> <span class="nf">GetAll</span><span class="p">()</span>
<span class="p">{</span>
<span class="k">using</span> <span class="p">(</span><span class="kt">var</span> <span class="n">connection</span> <span class="p">=</span> <span class="k">new</span> <span class="nf">MySqlConnection</span><span class="p">(</span><span class="n">CONN_STRING</span><span class="p">))</span>
<span class="p">{</span>
<span class="k">return</span> <span class="n">connection</span><span class="p">.</span><span class="n">Query</span><span class="p"><</span><span class="n">Product</span><span class="p">>(</span><span class="n">QUERY</span><span class="p">).</span><span class="nf">ToArray</span><span class="p">();</span>
<span class="p">}</span>
<span class="p">}</span>
<span class="p">}</span>
</code></pre></div></div>
<p><em>Dockerfile</em> is written following <a href="https://www.softwaredeveloper.blog/multi-project-dotnet-core-solution-in-docker-image"><em>Docker image from multi project .NET Core solution</em> post</a>.
Note that <em>Aspnetcoreapp</em> is our project name, and project directory name at the same time:</p>
<div class="language-dockerfile highlighter-rouge"><div class="highlight"><pre class="highlight"><code><span class="k">FROM</span><span class="s"> mcr.microsoft.com/dotnet/core/sdk:2.2 AS build-env</span>
<span class="k">WORKDIR</span><span class="s"> /app</span>
<span class="k">COPY</span><span class="s"> . ./</span>
<span class="k">RUN </span>dotnet publish Aspnetcoreapp <span class="nt">-c</span> Release <span class="nt">-o</span> out
<span class="k">FROM</span><span class="s"> mcr.microsoft.com/dotnet/core/aspnet:2.2</span>
<span class="k">WORKDIR</span><span class="s"> /app</span>
<span class="k">COPY</span><span class="s"> --from=build-env /app/Aspnetcoreapp/out .</span>
<span class="k">ENTRYPOINT</span><span class="s"> ["dotnet", "Aspnetcoreapp.dll"]</span>
</code></pre></div></div>
<h3 id="mysql-db">MySQL DB</h3>
<p>We could point DB image in docker-compose.yml file and configure environment variables and so on there, but I prefer to
configure service via Dockerfile. So we just create new directory with Dockerfile. It can be located anywhere, but I prefer the same level as C# project.
So I just create new <em>Db</em> directory, next to project directory (<em>Aspnetcoreapp</em>).
If you want to see this Dockerfile in IDE, you can reference it in solution directory.</p>
<div class="language-dockerfile highlighter-rouge"><div class="highlight"><pre class="highlight"><code><span class="k">FROM</span><span class="s"> mysql:5.7.13</span>
<span class="k">COPY</span><span class="s"> *.sql /docker-entrypoint-initdb.d</span>
<span class="k">ENV</span><span class="s"> MYSQL_ROOT_PASSWORD myPass</span>
<span class="k">EXPOSE</span><span class="s"> 3306</span>
</code></pre></div></div>
<p>With above <em>Dockerfile</em> we do several things:</p>
<ul>
<li>Specify which version of MySQL image to use</li>
<li>Set root user password to <em>myPass</em></li>
<li>Expose 3306 port to be able to access it from our app</li>
<li><strong>Initialize database</strong>, by copying SQL scripts to <em>/docker-entrypoint-initdb.d</em> directory inside DB container, because
<a href="https://hub.docker.com/_/mysql#initializing-a-fresh-instance">official MySQL image description tells us, that scripts
from this directory are invoked when DB is started for the first time</a>.</li>
</ul>
<p>Next we need some <em>.sql</em> script located next to <em>Dockerfile</em> to initialize our database. We use <em>*.sql</em> wildcard, so name doesn’t matter, it just need to end up with <em>.sql</em> extension - for example <em>Init.sql</em>:</p>
<div class="language-sql highlighter-rouge"><div class="highlight"><pre class="highlight"><code><span class="k">CREATE</span> <span class="k">DATABASE</span> <span class="nv">`product-db`</span> <span class="cm">/*!40100 COLLATE 'latin1_swedish_ci' */</span><span class="p">;</span>
<span class="n">USE</span> <span class="nv">`product-db`</span><span class="p">;</span>
<span class="k">CREATE</span> <span class="k">TABLE</span> <span class="nv">`product`</span> <span class="p">(</span>
<span class="nv">`Id`</span> <span class="n">INT</span> <span class="k">NOT</span> <span class="k">NULL</span> <span class="n">AUTO_INCREMENT</span><span class="p">,</span>
<span class="nv">`Name`</span> <span class="n">TEXT</span> <span class="k">NOT</span> <span class="k">NULL</span><span class="p">,</span>
<span class="nv">`Description`</span> <span class="n">TEXT</span> <span class="k">NOT</span> <span class="k">NULL</span><span class="p">,</span>
<span class="k">INDEX</span> <span class="nv">`Id`</span> <span class="p">(</span><span class="nv">`Id`</span><span class="p">)</span>
<span class="p">)</span>
<span class="k">COLLATE</span><span class="o">=</span><span class="s1">'latin1_swedish_ci'</span><span class="p">;</span>
<span class="k">INSERT</span> <span class="k">IGNORE</span> <span class="k">INTO</span> <span class="n">product</span> <span class="p">(</span><span class="n">Id</span><span class="p">,</span> <span class="n">Name</span><span class="p">,</span> <span class="n">Description</span><span class="p">)</span>
<span class="k">VALUES</span>
<span class="p">(</span><span class="mi">1</span><span class="p">,</span> <span class="nv">"Dependency Injection Principles, Practices, and Patterns"</span><span class="p">,</span> <span class="nv">"Book by Steven van Deursen and Mark Seemann"</span><span class="p">),</span>
<span class="p">(</span><span class="mi">2</span><span class="p">,</span> <span class="nv">"Agile Software Development, Principles, Patterns, and Practices"</span><span class="p">,</span> <span class="nv">"Book by Robert C. Martin"</span><span class="p">);</span>
</code></pre></div></div>
<h3 id="docker-composeyml-and-dockerignore">Docker-compose.yml and .dockerignore</h3>
<p>We take <em>docker-compose.yml</em> file described <a href="#docker-compose-file-example">earlier in this article</a>:</p>
<div class="language-yaml highlighter-rouge"><div class="highlight"><pre class="highlight"><code><span class="na">version</span><span class="pi">:</span> <span class="s1">'</span><span class="s">3'</span>
<span class="na">services</span><span class="pi">:</span>
<span class="na">db</span><span class="pi">:</span>
<span class="na">build</span><span class="pi">:</span> <span class="s">./Db</span>
<span class="na">app</span><span class="pi">:</span>
<span class="na">build</span><span class="pi">:</span>
<span class="na">context</span><span class="pi">:</span> <span class="s">.</span>
<span class="na">dockerfile</span><span class="pi">:</span> <span class="s">Aspnetcoreapp/Dockerfile</span>
<span class="na">ports</span><span class="pi">:</span>
<span class="pi">-</span> <span class="s">8080:80</span>
<span class="na">depends_on</span><span class="pi">:</span>
<span class="pi">-</span> <span class="s">db</span>
</code></pre></div></div>
<p>Very last thing - <em>.dockerignore</em> file located next to solution (<em>.sln</em>) file. If you don’t know what is this file or why it has to be in
this location, I’ve explained it in <a href="https://www.softwaredeveloper.blog/multi-project-dotnet-core-solution-in-docker-image#where-to-keep-dockerignore-file">previous post</a>.
Mine currently looks like this:</p>
<div class="highlighter-rouge"><div class="highlight"><pre class="highlight"><code>.dockerignore
.env
.git
.gitignore
.vs
.vscode
*/bin
*/obj
**/.toolstarget
.idea
</code></pre></div></div>
<h3 id="running-composed-system">Running composed system</h3>
<p>To run this example system, just go to solution directory, type <code class="highlighter-rouge">docker-compose up</code> command (<a href="#docker-compose-up">explained earlier</a>) and after a moment (DB initialization takes a while) you
can open browser and see data pulled from DB with <em>http://localhost:8080</em> GET method:
<img src="/assets/images/dotnet-core-with-mysql-app.jpg" alt="Browser with products taken from DB seen as JSON array" title="See data from DB in Browser" /></p>
<h3 id="persisting-db-data">Persisting DB data</h3>
<p>As you know, killed container is killed along with the data, which of course is not what we want from production database. To persist
changes which we introduced to DB during production runtime, we need to use <em>volumes</em>, but I thought that it’s too much for simple introduction
article. If you succeeded previous steps, now you can <a href="https://docs.docker.com/compose/compose-file/#volume-configuration-reference">read about docker volumes</a>.
Maybe some day I will explain it in whole different post.</p>
<h2 id="summary">Summary</h2>
<p>As you see, composing in general is simple, and basically requires one text file which instructs Docker how to run and couple containers together.</p>
<p>I hope you find this introduction useful.
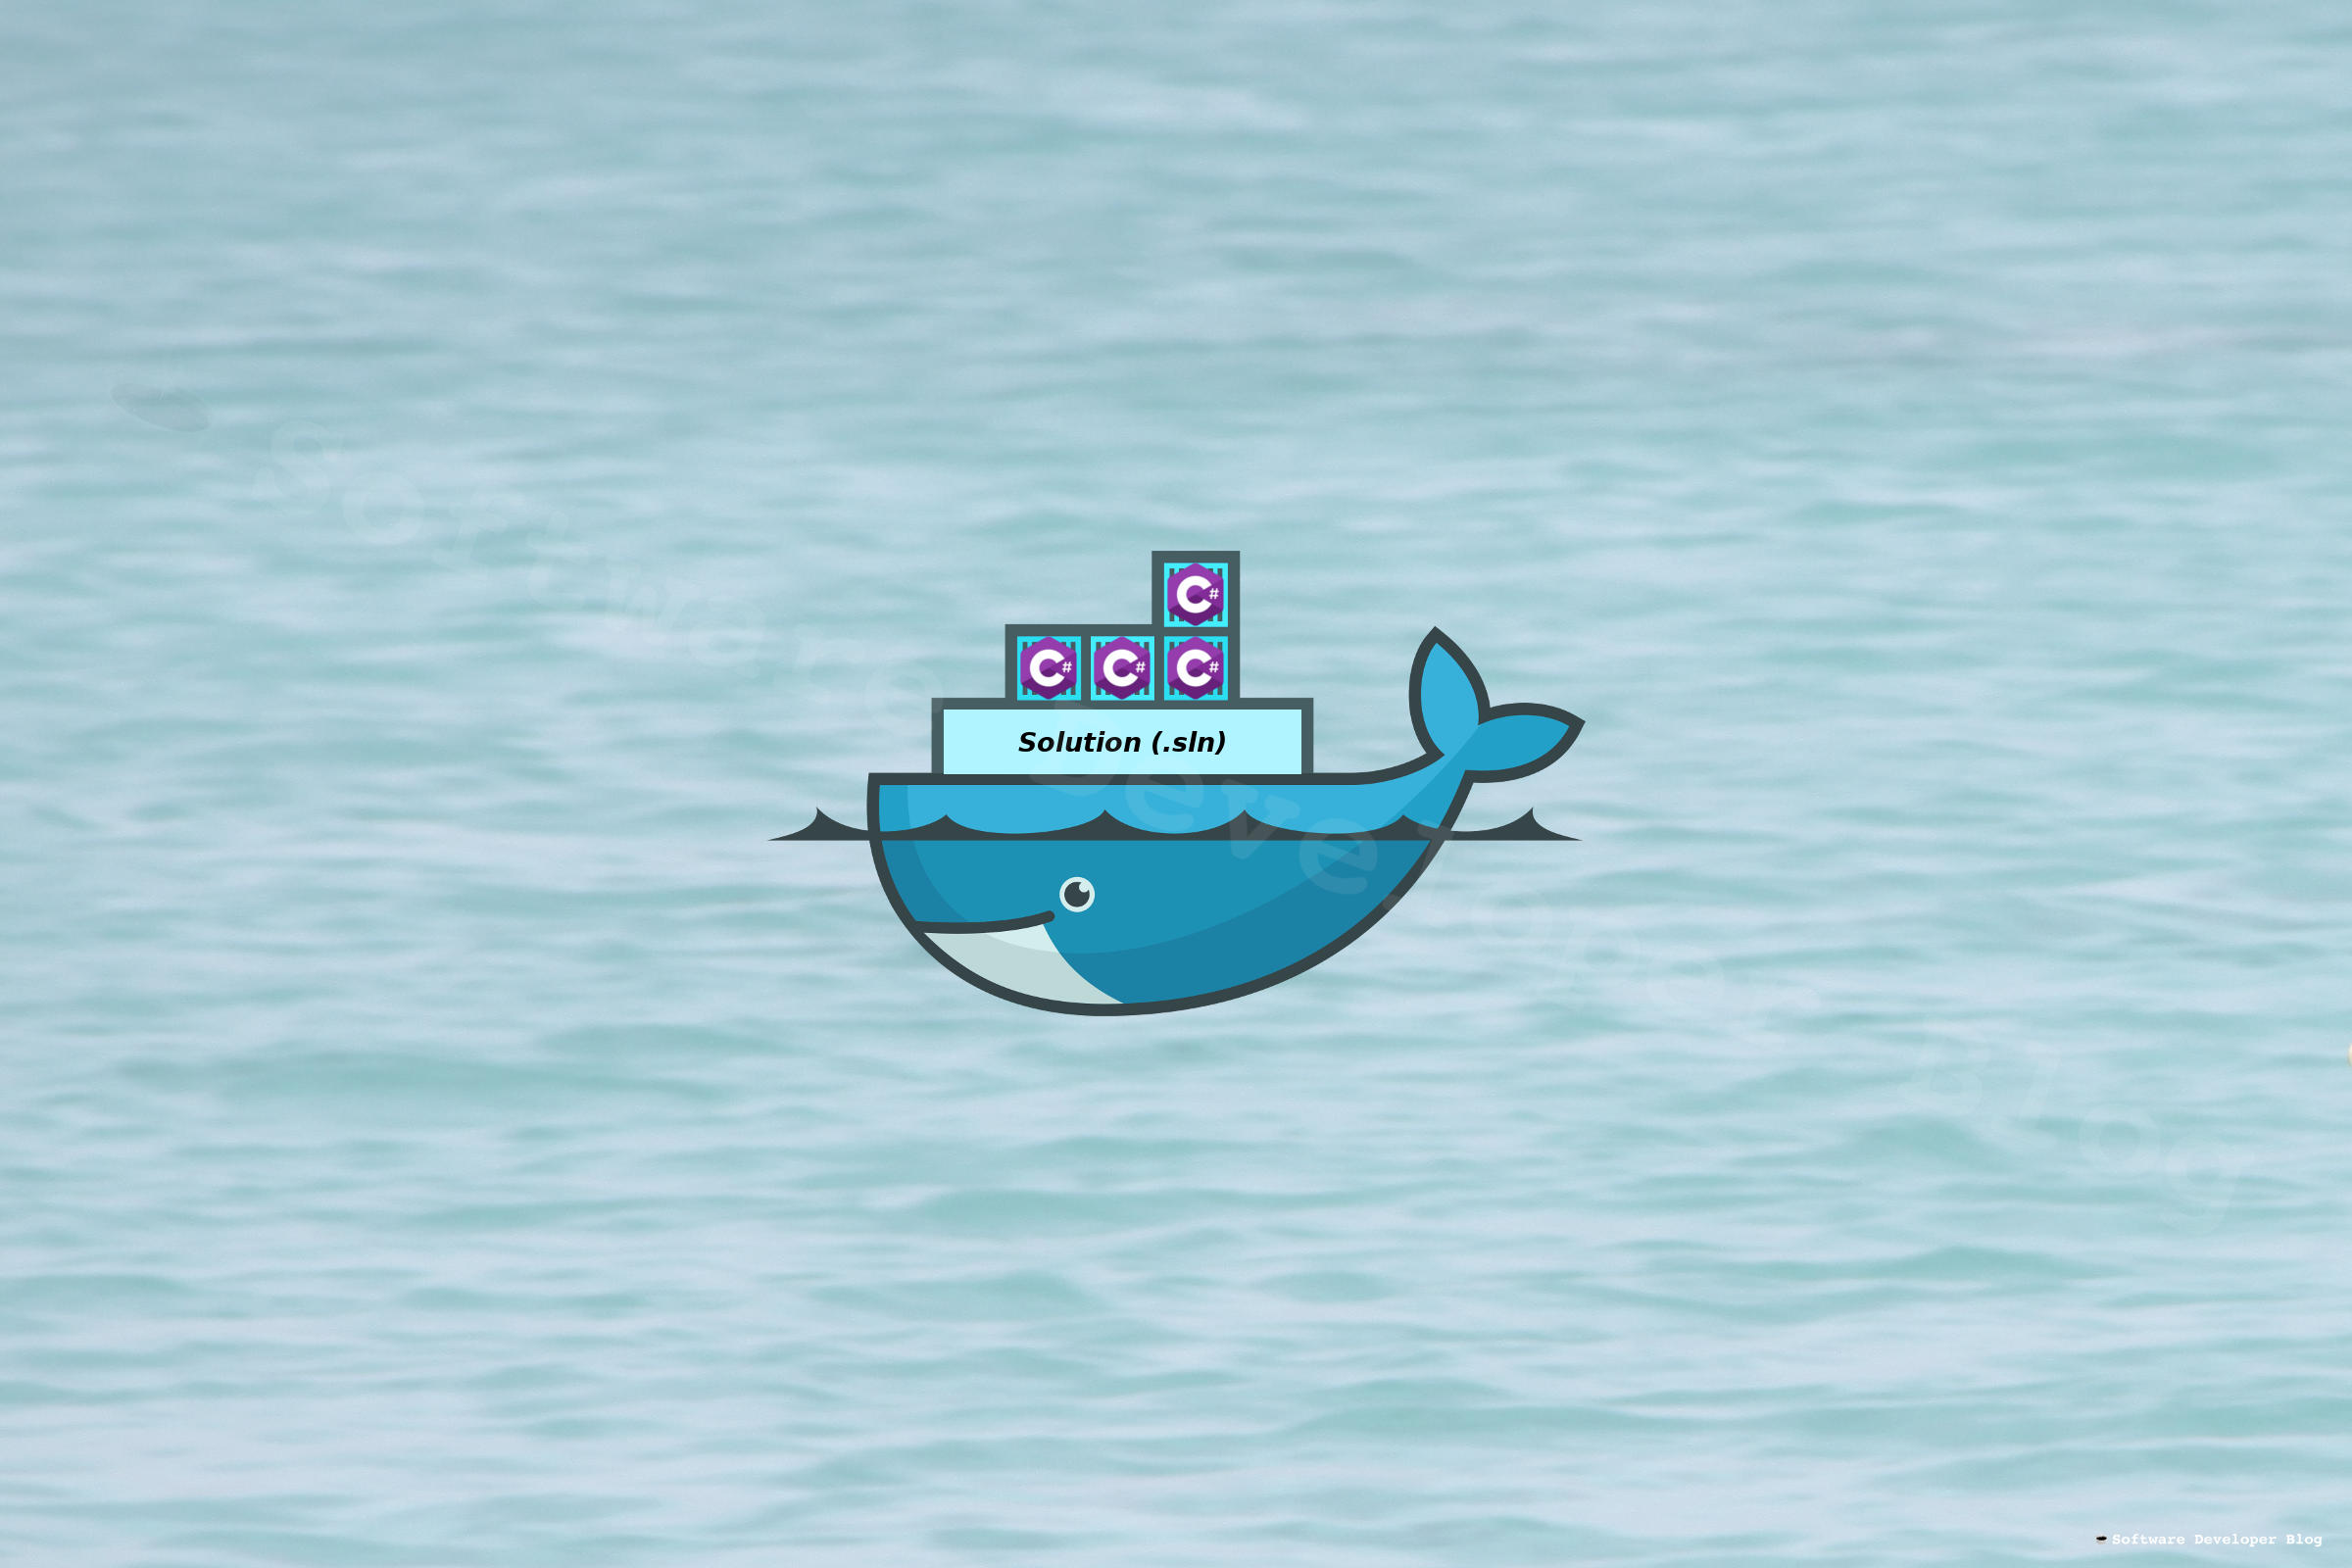
If there is something not clear, ask me a question in comment, and if you think it can help other too, share this article on <a href="https://www.facebook.com/sharer/sharer.php?u=https://www.softwaredeveloper.blog/docker-compose-introduction-dotnet-core-app-composed-with-mysql-database">Facebook</a> or <a href="https://twitter.com/share?text=Docker+compose+introduction+-+Dotnet+core+app+with+MySQL+Database&url=https://www.softwaredeveloper.blog/docker-compose-introduction-dotnet-core-app-composed-with-mysql-database">Twitter</a> :)</p>TometchyIntroduction to docker-compose - basic aspects explained with .NET Core app and MySQL DB composed together.Multi-project .net core solution in Docker imagehttps://www.softwaredeveloper.blog/assets/images/docker-multiproject-solution.jpghttps://www.softwaredeveloper.blog/assets/images/docker-multiproject-solution.jpgMulti-project .net core solution in Docker image
https://www.softwaredeveloper.blog/multi-project-dotnet-core-solution-in-docker-image
2019-07-27T08:00:00+00:002020-03-20T16:00:00+00:00https://www.softwaredeveloper.blog/multi-project-dotnet-core-solution-in-docker-image<p>Creating Docker images from dotnet solution with project references is easy when you understand basics of Docker commands, but writing proper Dockerfile can be tricky for beginners.</p>
<p>Most of the examples show how to dockerize dotnet project, assuming that it has no local dependencies.
So let’s analyse what can we do, when our project has references to other projects from solution.
We will start with diving into simple example without dependencies first, to understand what changes we introduce and why.<br />
If you just want to <a href="#solution">skip to solution</a> and copy-paste it, of course you can do it, but it’s not recommended, because
sooner or later you will be blocked with another obstacle due to not understanding what is happening, and in result you will waste more time.
This article is good to start learning Docker instructions and commands, because everything is explained with short, plain language.
We will use <em>.net core 2.2</em> as it’s current version at the moment of writing.</p>
<p>Example dockerized dotnet core application is <a href="https://github.com/SoftwareDeveloperBlog/Docker-dotnet-core-multi-project-solution">available on GitHub</a>, feel free to use it for your needs.</p>
<h2 id="analysis-of-official-docker-example">Analysis of official Docker example</h2>
<p>Official <a href="https://docs.docker.com/engine/examples/dotnetcore">dockerize an .NET Core application article</a> shows us this Dockerfile located in project folder (where <em>.csproj</em> file is stored):</p>
<figure class="highlight"><pre><code class="language-dockerfile" data-lang="dockerfile"><span class="k">FROM</span><span class="s"> mcr.microsoft.com/dotnet/core/sdk:2.2 AS build-env</span>
<span class="k">WORKDIR</span><span class="s"> /app</span>
<span class="c"># Copy csproj and restore as distinct layers</span>
<span class="k">COPY</span><span class="s"> *.csproj ./</span>
<span class="k">RUN </span>dotnet restore
<span class="c"># Copy everything else and build</span>
<span class="k">COPY</span><span class="s"> . ./</span>
<span class="k">RUN </span>dotnet publish <span class="nt">-c</span> Release <span class="nt">-o</span> out
<span class="c"># Build runtime image</span>
<span class="k">FROM</span><span class="s"> mcr.microsoft.com/dotnet/core/aspnet:2.2</span>
<span class="k">WORKDIR</span><span class="s"> /app</span>
<span class="k">COPY</span><span class="s"> --from=build-env /app/out .</span>
<span class="k">ENTRYPOINT</span><span class="s"> ["dotnet", "PROJECT_NAME.dll"]</span></code></pre></figure>
<p>and those two commands, to be run from project folder where Dockerfile is located:</p>
<figure class="highlight"><pre><code class="language-bash" data-lang="bash">docker build <span class="nt">-t</span> aspnetapp <span class="nb">.</span>
docker run <span class="nt">-d</span> <span class="nt">-p</span> 8080:80 <span class="nt">--name</span> myapp aspnetapp</code></pre></figure>
<h3 id="dockerfile-from-instruction">Dockerfile FROM instruction</h3>
<p>Our Dockerfile starts with <em>FROM</em> instruction:<br />
<code class="highlighter-rouge">FROM mcr.microsoft.com/dotnet/core/sdk:2.2 AS build-env</code><br />
which means that we base our image on official <em>Microsoft Dotnet Core SDK</em> in version 2.2.
We use SDK at this moment, not production runtime, because we will compile our application in Docker during building image.
So you don’t even need to have .net core SDK installed on your host machine, this Dockerfile is prepared in a way that you won’t compile
your app for Docker image yourself - Docker will compile it. You could use binaries built on your host machine, but it’s not safe - it may not work due to compatibility troubles.
Why there is <code class="highlighter-rouge">AS build-env</code> instruction - we will come to this later (in <a href="#docker-multi-stage-build">Docker multi-stage build</a> section).</p>
<h3 id="dockerfile-workdir-instruction">Dockerfile WORKDIR instruction</h3>
<p>In second line we see <code class="highlighter-rouge">WORKDIR /app</code> instruction which means, that following RUN, CMD, ENTRYPOINT, COPY and ADD instructions in our Dockerfile
will be executed in <em>/app</em> directory. If it doesn’t exist it will be created (even if it wouldn’t be used).</p>
<h3 id="dockerfile-copy-instruction">Dockerfile COPY instruction</h3>
<p>Next we see <code class="highlighter-rouge">COPY *.csproj ./</code> instruction, which means that all csproj files from Docker build context will be copied to workdir (<em>/app</em>) directory
inside Docker image. <a href="#docker-build-command">Docker build command will be explained later</a>, but in short - build context is the directory from your host
machine, pointed in Docker build command. If you point <code class="highlighter-rouge">.</code> path, the directory where you execute command is taken.
So in our case we copy only one <em>csproj</em> file, because we run build command with project directory set as build context.</p>
<h3 id="dockerfile-run-instruction">Dockerfile RUN instruction</h3>
<p>Next is <code class="highlighter-rouge">RUN dotnet restore</code> instruction, which simply runs <code class="highlighter-rouge">dotnet restore</code> command in our workdir (<em>/app</em>) directory.
At this moment inside <em>/app</em> directory in our image, is nothing but <em>.csproj</em> of our project, because we copied only it
in previous step, but it’s enough for restoring nuget dependencies.</p>
<h3 id="copy-and-compile-app-source">Copy and compile app source</h3>
<p>Again we see <a href="#dockerfile-copy-instruction">COPY instruction</a> - <code class="highlighter-rouge">COPY . ./</code> to copy everything from our build context - in our case
it means project files (.cs files etc.), because we run <a href="#docker-build-command">docker build command</a> with project directory set as build context.
Then with <a href="#dockerfile-run-instruction">run instruction</a> - <code class="highlighter-rouge">RUN dotnet publish -c Release -o out</code> we simply run <code class="highlighter-rouge">dotnet publish</code> in our workdir (<em>/app</em>)
directory inside image, with <code class="highlighter-rouge">-c Release -o out</code> parameters. This dotnet command
compiles our app with release configuration and publishes results in <em>out</em> directory (in our case <em>/app/out</em>).
We can compile source because we <a href="#dockerfile-from-instruction">base this image on developer’s sdk</a>.</p>
<h3 id="docker-multi-stage-build">Docker multi-stage build</h3>
<p>Once again we see <a href="#dockerfile-from-instruction">FROM instruction</a>, which sets on which image we base our image…
How it’s possible to specify it again, with different base? It’s quite fresh Docker feature (since Docker 17.05 version) called multi-stage builds.
When we use FROM keyword again, we mean that previous image specified above is temporary, and was used only to serve some purpose.
In our case it was made only to compile our application - that’s why we used SDK as base image. Now we specify base image again and this time
we are preparing our <em>real</em> image - the one which will be deployed to production, and this one doesn’t base on SDK, only on production runtime,
which gives smaller size in result. We will just copy our compiled app from temporary image. So again we specify working directory to <em>/app</em>
catalog and then we copy our binaries - <code class="highlighter-rouge">COPY --from=build-env /app/out .</code> which means copy files from <em>/app/out/</em> from <em>build-env</em> image
(that’s why we gave it a name in the first line) to current working directory (<em>/app</em>).</p>
<h3 id="dockerfile-entrypoint-instruction">Dockerfile ENTRYPOINT instruction</h3>
<p>Very last instruction in this Dockerfile is <em>ENTRYPOINT</em>, which (in simple terms) specifies a command that will be executed when the container starts.
So in our case - <code class="highlighter-rouge">ENTRYPOINT ["dotnet", "PROJECT_NAME.dll"]</code> - Docker will run <code class="highlighter-rouge">dotnet</code> with <code class="highlighter-rouge">PROJECT_NAME.dll</code> parameter (which should be
replaced to our project name of course), to start our app.</p>
<h3 id="docker-build-command">Docker build command</h3>
<p>With such Dockerfile, we are told to run <code class="highlighter-rouge">docker build -t aspnetapp .</code> command in project directory (where Dockerfile is stored).
Option: <code class="highlighter-rouge">-t name</code> (<code class="highlighter-rouge">--tag name</code>) is not mandatory - it allows to tag image (to name it and optionally give it a tag in ‘name:tag’ format), so don’t focus on it,
and look on this command this way: <code class="highlighter-rouge">docker build .</code>, because important thing is after options - build context parameter.
Build context is path on host machine which will be accessible during building image for Dockerfile instructions.
In our case it’s <code class="highlighter-rouge">.</code> path which means that the directory where we run this command is passed as build context.
Because we are told to run this command in project directory (where <em>.csproj</em> file is stored), our project files are passed as build context.</p>
<h3 id="docker-run-command">Docker run command</h3>
<p>Docker run command creates container from image.
Image is readonly <em>manual</em> for Docker, to create container, and container is working <em>virtual machine</em> where our app lives.
We can think about it this way: image is like a class in object-oriented programming, and container is like an instance, created from this class.
So we can create as many containers (instances) as we want, and it doesn’t affect image (class) - image is only necessary to let Docker know how to create container.
We are told to run it this way:<br />
<code class="highlighter-rouge">docker run -d -p 8080:80 --name myapp aspnetapp</code><br />
Without <code class="highlighter-rouge">--detach</code> option (<code class="highlighter-rouge">-d</code>) we will start seeing app console output from container.
With <code class="highlighter-rouge">--publish</code> (<code class="highlighter-rouge">-p</code>) option we bind container’s port(s) to the host (by default with TCP, but you can specify UDP and SCTP as well).
With <code class="highlighter-rouge">--name</code> option we assign a name to the container (without this option Docker will choose some funny name for us).
At the end we pass image name, which Docker will read to create container. Because we named our image <em>aspnetapp</em>, we use this name here.</p>
<h2 id="solution">Solution</h2>
<h3 id="proper-docker-commands">Proper Docker commands</h3>
<p>Once we understand what happens in basic example, let’s see how to change it, to make it work when our project has references to other
solution projects.<br />
The problem is of course, that we run Docker build command from project directory passing <code class="highlighter-rouge">.</code> path as build context.
This means, that files only from this directory will be accessible during building image, and depending projects are of course in other
directories. We have several options to fix this. We can move Dockerfile one level up (to solution directory) and run <code class="highlighter-rouge">docker build</code> from there.
But it’s recommended to have Dockerfile in project directory, to be able to have more than one Dockerfile in solution (for different projects).
You could also run <code class="highlighter-rouge">docker build</code> as before (from project directory), but change build context path to one level up (<code class="highlighter-rouge">..</code>).
In my view more elegant is third solution - to <strong>run docker build from solution directory</strong>, pass <code class="highlighter-rouge">.</code> as build context and to specify which Dockerfile we want
to read with <code class="highlighter-rouge">--file</code> (<code class="highlighter-rouge">-f</code>) option, <strong>like this</strong>:<br />
<code class="highlighter-rouge">docker build -f PROJECT_DIRECTORY/Dockerfile -t IMAGE_NAME .</code></p>
<h3 id="how-to-adjust-dockerfile">How to adjust Dockerfile</h3>
<p>Next we need to adjust Dockerfile, because the one from official example assume that we have project directory as build context.
My version looks like this:</p>
<figure class="highlight"><pre><code class="language-dockerfile" data-lang="dockerfile"><span class="k">FROM</span><span class="s"> mcr.microsoft.com/dotnet/core/sdk:2.2 AS build-env</span>
<span class="k">WORKDIR</span><span class="s"> /app</span>
<span class="k">COPY</span><span class="s"> . ./</span>
<span class="k">RUN </span>dotnet publish PROJECT_NAME <span class="nt">-c</span> Release <span class="nt">-o</span> out
<span class="k">FROM</span><span class="s"> mcr.microsoft.com/dotnet/core/aspnet:2.2</span>
<span class="k">WORKDIR</span><span class="s"> /app</span>
<span class="k">COPY</span><span class="s"> --from=build-env /app/PROJECT_NAME/out .</span>
<span class="k">ENTRYPOINT</span><span class="s"> ["dotnet", "PROJECT_NAME.dll"]</span></code></pre></figure>
<p>I have skipped restoring nuget packages as single step to simplify, restore is included in <code class="highlighter-rouge">dotnet publish</code> and if it fails due to nuget failure,
error message is legible. But if you have many nuget dependencies you may want to have separate step, because this way Docker treats it as distinct layer and reuses it
if none of <em>csproj</em> file changed, which gives <a href="https://www.softwaredeveloper.blog/optimize-building-net-core-docker-image">smaller build time</a> (I have described it in <a href="https://www.softwaredeveloper.blog/optimize-building-net-core-docker-image">another post</a>). In this demo restoring nugets is fast enough to skip it, but remember about this if you have long building time (in particular - <em>Restore completed in…</em> time).</p>
<p>So we copy all projects (because build context is now solution directory) to <em>/app</em> directory inside container.
Next from <em>/app</em> workdir we run <code class="highlighter-rouge">dotnet publish</code> command, specifying which project to compile -
<code class="highlighter-rouge">RUN dotnet publish PROJECT_NAME -c Release -o out</code> - here PROJECT_NAME is the directory name with <em>.csproj</em> file inside.</p>
<p>Other instructions stays untouched with one small change - during copying compiled app from temporary image, this time we need to pass project name to path:<br />
<code class="highlighter-rouge">COPY --from=build-env /app/PROJECT_NAME/out .</code></p>
<h3 id="where-to-keep-dockerignore-file">Where to keep .dockerignore file</h3>
<p>Official article says to add <em>.dockerignore</em> file to project directory, to make build context as small as possible and lower risk of invalidating cache, which of course is
reasonable. But Docker CLI looks for <em>.dockerignore</em> file in root directory of the build context, so now we need to move it to solution
directory. But in my view it’s even better, because we don’t need to create and maintain many <em>.dockerignore</em> files for many projects,
we keep one for all of them. Example rules:</p>
<figure class="highlight"><pre><code class="language-dockerfile" data-lang="dockerfile">*/bin
*/obj
.dockerignore
.env
.git
.gitignore
.vs
.vscode
**/.toolstarget
.idea</code></pre></figure>
<h2 id="summary">Summary</h2>
<p>When I had to dockerize .net core app for the first time I just took Dockerfile from mentioned article, copy-pasted Docker commands
and when I faced obstacle I tried to solve it without analysis of how Docker works. After wasting some time this way, I wasted time again - trying
to just copy-paste solution from the internet - again without analysis of what I do, and without success too. Then I learned (once again in my life…), that haste didn’t save
time, but do the opposite - waste it.
Because I didn’t find proper article nor tutorial to start I came though official documentation and manuals, which are written nice, but have too many
details for beginners.
This article shows essentials of analysis I took and explains basics with plain language. I hope this way it is good to start writing proper Dockerfile,
without having trouble with situation like the one presented here - dotnet project with references to other projects from solution, nor with any other obstacle.</p>
<p>What to do when you have already containerized your app, but need to use some dependent system, for example DB?
You can compose them together with docker-compose, which I have described with simple <a href="https://www.softwaredeveloper.blog/docker-compose-introduction-dotnet-core-app-composed-with-mysql-database">.NET Core app and MySQL DB as composed system example</a>, in next article.</p>
<p>Don’t hesitate to write comment whether it was helpful for you, or to share it on Facebook or Twitter :)</p>TometchyCreating Docker images from dotnet solution with project references is easy when you understand basics of Docker commands, but writing proper Dockerfile can be tricky for beginners.Fare (xeger) - generate string that matches regex pattern in C#https://www.softwaredeveloper.blog/assets/images/regex-xeger.jpghttps://www.softwaredeveloper.blog/assets/images/regex-xeger.jpgFare (xeger) - generate string that matches regex pattern in C#
https://www.softwaredeveloper.blog/fare-generate-string-matching-regex-in-csharp
2019-03-18T10:00:00+00:002019-04-01T09:00:00+00:00https://www.softwaredeveloper.blog/fare-generate-string-matching-regex-in-csharp<p>Matching text using regex patterns is extremely useful.
But sometimes we need to invert this process and create text which will match the regex.
The solution has already been written.</p>
<p>When I faced this problem for the first time, and quick search on the internet didn’t bring up anything useful, I thought:</p>
<blockquote>
<p>I will implement simple generator. I know basic rules of how regex patterns work, I just need to invert them with correct random value.</p>
</blockquote>
<p>Hey, I’m a software developer, so called <em>Not Invented Here Syndrome</em> is our frequent problem :)
Looking through the internet I can tell that I’m not the only one who had the same idea about generating regex inputs.</p>
<p>So I started implementation, but after a while I realized that I don’t have enough time to satisfy all cases, so I focused only on basics, which could be enough for my problem.</p>
<p>Luckily I decided to repeat internet research, this time putting bigger effort into it.
There were no many articles around this topic, but this time I found solution which was easy to use and better than my own implementation.</p>
<h2 id="fare-project">Fare project</h2>
<p><a href="https://github.com/moodmosaic/Fare">Fare</a> is a .NET port of libraries appreciated by Java community: <a href="https://www.brics.dk/automaton/">dk.brics.automaton</a> and <a href="https://github.com/bluezio/xeger">xeger</a>.
The first library has focus in <a href="https://en.wikipedia.org/wiki/Nondeterministic_finite_automaton">nondeterministic and deterministtic finite automaton</a>. On top of it is built xeger, which is meant to be opposite of regex - it uses finite state machine for creating text which match passed regular expression.</p>
<p>In Java world you need them both. In .NET we have them under one project called Fare, which stands for <strong>F</strong>inite <strong>A</strong>utomata and <strong>R</strong>egular <strong>E</strong>xpressions.</p>
<p>It’s convenient library known by many companies as well as open source projects, for example <a href="https://github.com/AutoFixture/AutoFixture/search?q=fare&unscoped_q=fare">AutoFixture</a>
or <a href="https://github.com/WireMock-Net/WireMock.Net/search?q=fare&unscoped_q=fare">WireMock.Net</a>.</p>
<h2 id="fare-hello-world-example">Fare <em>Hello world</em> example</h2>
<p>You can download Fare <a href="https://www.nuget.org/packages/Fare/">from nuget</a>, it works for .NET Framework and for .NET Core.
For example, I’m writing following instructions with Fare version 2.1.1 on Linux Mint 19 Tara in .NET Core 2.2 console application.</p>
<p>You just need to create <code class="highlighter-rouge">Xeger</code> object with your regex pattern (as string) and with <code class="highlighter-rouge">Random</code> object.</p>
<figure class="highlight"><pre><code class="language-csharp" data-lang="csharp"><span class="kt">string</span> <span class="n">regex</span> <span class="p">=</span> <span class="s">"t.m"</span><span class="p">;</span>
<span class="n">Xeger</span> <span class="n">xeger</span> <span class="p">=</span> <span class="k">new</span> <span class="nf">Xeger</span><span class="p">(</span><span class="n">regex</span><span class="p">,</span> <span class="k">new</span> <span class="nf">Random</span><span class="p">());</span>
<span class="n">Console</span><span class="p">.</span><span class="nf">WriteLine</span><span class="p">(</span><span class="s">$"Input text matching regex: '</span><span class="p">{</span><span class="n">regex</span><span class="p">}</span><span class="s">' is: '</span><span class="p">{</span><span class="n">xeger</span><span class="p">.</span><span class="nf">Generate</span><span class="p">()}</span><span class="s">'"</span><span class="p">);</span>
<span class="cm">/* Example output:
Input text matching regex: 't.m' is: 't8m'
*/</span></code></pre></figure>
<p>Basically that’s it. In above example input will be random every time.
To see how generated inputs might differ, let’s replace <em>t.m</em> pattern with <em>t.*m</em> pattern and loop generating ten times.
As you will see, with <em>.*</em> pattern results might be any size, including 0 (see last input in my example, it’s real value copied from my console output).</p>
<figure class="highlight"><pre><code class="language-csharp" data-lang="csharp"><span class="kt">string</span> <span class="n">regex</span> <span class="p">=</span> <span class="s">"t.*m"</span><span class="p">;</span>
<span class="n">Xeger</span> <span class="n">xeger</span> <span class="p">=</span> <span class="k">new</span> <span class="nf">Xeger</span><span class="p">(</span><span class="n">regex</span><span class="p">,</span> <span class="k">new</span> <span class="nf">Random</span><span class="p">());</span>
<span class="k">for</span><span class="p">(</span><span class="kt">var</span> <span class="n">i</span><span class="p">=</span><span class="m">0</span><span class="p">;</span> <span class="n">i</span><span class="p"><</span><span class="m">10</span><span class="p">;</span> <span class="n">i</span><span class="p">++)</span>
<span class="n">Console</span><span class="p">.</span><span class="nf">WriteLine</span><span class="p">(</span><span class="s">$"Input text matching regex: '</span><span class="p">{</span><span class="n">regex</span><span class="p">}</span><span class="s">' is: '</span><span class="p">{</span><span class="n">xeger</span><span class="p">.</span><span class="nf">Generate</span><span class="p">()}</span><span class="s">'"</span><span class="p">);</span>
<span class="cm">/* Example output:
Input text matching regex: 't.*m' is: 'trmYwmm'
Input text matching regex: 't.*m' is: 'tsm!tw-m:s}mm'
Input text matching regex: 't.*m' is: 't}}*3molmrxBGmmss-mm'
Input text matching regex: 't.*m' is: 'tLy4mmmm'
Input text matching regex: 't.*m' is: 'tCkm=!?iI|mm"LmmV}wm"63mmnb.G+mxzumNm`wn[m'
Input text matching regex: 't.*m' is: 'tux@mByyQ~8vxm'
Input text matching regex: 't.*m' is: 'tn|mmu npmj/~w#mmmmmm9mm'
Input text matching regex: 't.*m' is: 't}Zm'
Input text matching regex: 't.*m' is: 'tomX}8kkV{j)x<S}_mTmm'
Input text matching regex: 't.*m' is: 'tm'
*/</span></code></pre></figure>
<h2 id="deterministic-fare-input">Deterministic Fare input</h2>
<p>When we pass <code class="highlighter-rouge">new Random()</code> to <code class="highlighter-rouge">Xeger</code> constructor, Fare generates random input. Usually that’s what we want, but sometimes we need to have the same input for
given regex every time (that was my production case). How to achieve that? You can simply pass constant seed to dotnet <code class="highlighter-rouge">Random</code> constructor,
for example 0 :) That’s it, now under the same runtime your input generation sequence will be the same.</p>
<figure class="highlight"><pre><code class="language-csharp" data-lang="csharp"><span class="kt">string</span> <span class="n">regex</span> <span class="p">=</span> <span class="s">"t.*m"</span><span class="p">;</span>
<span class="n">Xeger</span> <span class="n">xeger</span> <span class="p">=</span> <span class="k">new</span> <span class="nf">Xeger</span><span class="p">(</span><span class="n">regex</span><span class="p">,</span> <span class="k">new</span> <span class="nf">Random</span><span class="p">(</span><span class="m">0</span><span class="p">));</span> <span class="c1">// Note zero in Random constructor</span>
<span class="k">for</span><span class="p">(</span><span class="kt">var</span> <span class="n">i</span><span class="p">=</span><span class="m">0</span><span class="p">;</span> <span class="n">i</span><span class="p"><</span><span class="m">10</span><span class="p">;</span> <span class="n">i</span><span class="p">++)</span>
<span class="n">Console</span><span class="p">.</span><span class="nf">WriteLine</span><span class="p">(</span><span class="s">$"Input text matching regex: '</span><span class="p">{</span><span class="n">regex</span><span class="p">}</span><span class="s">' is: '</span><span class="p">{</span><span class="n">xeger</span><span class="p">.</span><span class="nf">Generate</span><span class="p">()}</span><span class="s">'"</span><span class="p">);</span>
<span class="cm">/* Output sequence in my environment will be every run the same:
Input text matching regex: 't.*m' is: 'tm'
Input text matching regex: 't.*m' is: 't~6x~bm^m'
Input text matching regex: 't.*m' is: 'tmoBlz=~z5mC1zvcmmqm'
Input text matching regex: 't.*m' is: 't|lym'
Input text matching regex: 't.*m' is: 'teDsmmmmy6m'
Input text matching regex: 't.*m' is: 'tmmmm'
Input text matching regex: 't.*m' is: 't~pm'
Input text matching regex: 't.*m' is: 't|5mmrw5|ommxmpNlo`x~G^wym'
Input text matching regex: 't.*m' is: 't%+u=mm~mrmmkm*mmmlU/w7\OyncmrDdx<lnm'
Input text matching regex: 't.*m' is: 't$X`w`mm:m~o~m'
*/</span></code></pre></figure>
<h2 id="benchmarks">Benchmarks</h2>
<p>Usually fare is quite fast and should be sufficient for production requirements.
I have created a few benchmarks, with usual process priority, just for orientation.
As you will see, reusing <code class="highlighter-rouge">xeger</code> is really fast (and generation time is repeatable) and creating xeger requires acceptable time as well.
But remember that xeger with complex regex needs much more time than simple one, for example creating xeger with regex matching email address (taken from
<a href="https://www.regextester.com/19">regextester.com</a>) takes for me 50 milliseconds:
<sub><sup><code>^[a-zA-Z0-9.!#$%&'*+/=?^_`{|}~-]+@[a-zA-Z0-9](?:[a-zA-Z0-9-]{0,61}[a-zA-Z0-9])?(?:\.[a-zA-Z0-9](?:[a-zA-Z0-9-]{0,61}[a-zA-Z0-9])?)*$</code></sup></sub>.</p>
<table>
<thead>
<tr>
<th>Measured operation</th>
<th>Preparation</th>
<th>Mean time</th>
</tr>
</thead>
<tbody>
<tr>
<td><code>new Xeger(_regex, _random);</code></td>
<td><code>_random = new Random(); _regex = "t";</code></td>
<td>274.6 ns <sub><sup>(nanos.)</sup></sub></td>
</tr>
<tr>
<td><code>new Xeger(_regex, _random);</code></td>
<td><code>_random = new Random(); _regex = "t.m";</code></td>
<td>105.9 us <sub><sup>(micros.)</sup></sub></td>
</tr>
<tr>
<td><code>new Xeger(_regex, _random);</code></td>
<td><code>_random = new Random(); _regex = "t.*m";</code></td>
<td>160.7 us <sub><sup>(micros.)</sup></sub></td>
</tr>
<tr>
<td><code>new Xeger(_regex, _random);</code></td>
<td><code>_random = new Random(); _regex = "alice|tom";</code></td>
<td>343.6 us <sub><sup>(micros.)</sup></sub></td>
</tr>
<tr>
<td><code>new Xeger(_regex, _random);</code></td>
<td><code>_random = new Random();</code><br /><sub><sup><code>_regex = "[a-z.!#$%&'*+=?^_`{|}~-]+@.*(?:[a-z]{0,61}.*)?(?:\\..*(?:[a-z]{0,61}[a-z])?)*";</code></sup></sub></td>
<td>9.042 ms <sub><sup>(millis.)</sup></sub></td>
</tr>
<tr>
<td><code>_xeger.Generate();</code></td>
<td><code>_xeger = new Xeger("t", new Random());</code></td>
<td>650.5 ns <sub><sup>(nanos.)</sup></sub></td>
</tr>
<tr>
<td><sub><sup><code>for(int i=0; i<1000; i++) _xeger.Generate();</code></sup></sub></td>
<td><code>_xeger = new Xeger("t", new Random());</code></td>
<td>656.0 us <sub><sup>(micros.)</sup></sub></td>
</tr>
<tr>
<td><code>_xeger.Generate();</code></td>
<td><code>_xeger = new Xeger("t.m", new Random());</code></td>
<td>1.420 us <sub><sup>(micros.)</sup></sub></td>
</tr>
<tr>
<td><sub><sup><code>for(int i=0; i<1000; i++) _xeger.Generate();</code></sup></sub></td>
<td><code>_xeger = new Xeger("t.m", new Random());</code></td>
<td>1.437 ms <sub><sup>(millis.)</sup></sub></td>
</tr>
<tr>
<td><code>_xeger.Generate();</code></td>
<td><code>_xeger = new Xeger("t.*m", new Random());</code></td>
<td>9.989 us <sub><sup>(micros.)</sup></sub></td>
</tr>
<tr>
<td><sub><sup><code>for(int i=0; i<1000; i++) _xeger.Generate();</code></sup></sub></td>
<td><code>_xeger = new Xeger("t.*m", new Random());</code></td>
<td>10.05 ms <sub><sup>(millis.)</sup></sub></td>
</tr>
<tr>
<td><code>_xeger.Generate();</code></td>
<td><code>_xeger = new Xeger(<sub><sup>"alice|tom"</sup></sub>, new Random());</code></td>
<td>2.217 us <sub><sup>(micros.)</sup></sub></td>
</tr>
<tr>
<td><sub><sup><code>for(int i=0; i<1000; i++) _xeger.Generate();</code></sup></sub></td>
<td><code>_xeger = new Xeger(<sub><sup>"alice|tom"</sup></sub>, new Random());</code></td>
<td>2.183 ms <sub><sup>(millis.)</sup></sub></td>
</tr>
<tr>
<td><code>_xeger.Generate();</code></td>
<td><code><sub><sup>_xeger = new Xeger("[a-z.!#$%&'*+=?^_`{|}~-]+@.*(?:[a-z]{0,61}.*)?(?:\\..*(?:[a-z]{0,61}[a-z])?)*"<br />, new Random());</sup></sub></code></td>
<td>8.435 us <sub><sup>(micros.)</sup></sub></td>
</tr>
<tr>
<td><sub><sup><code>for(int i=0; i<1000; i++) _xeger.Generate();</code></sup></sub></td>
<td><code><sub><sup>_xeger = new Xeger("[a-z.!#$%&'*+=?^_`{|}~-]+@.*(?:[a-z]{0,61}.*)?(?:\\..*(?:[a-z]{0,61}[a-z])?)*"<br />, new Random());</sup></sub></code></td>
<td>8.160 ms <sub><sup>(millis.)</sup></sub></td>
</tr>
</tbody>
</table>
<p style="text-align: right">
<sub><sup><sup>
BenchmarkDotNet=v0.11.4, OS=linuxmint 19 Intel Core i7-4702MQ CPU 2.20GHz (Haswell), 1 CPU, 8 logical and 4 physical cores<br />
.NET Core SDK=2.2.105 [Host] : .NET Core 2.2.3 (CoreCLR 4.6.27414.05, CoreFX 4.6.27414.05), 64bit RyuJIT<br />
</sup></sup></sub>
</p>
<h2 id="downsides-of-fare">Downsides of Fare</h2>
<h3 id="pattern-with-unspecified-length-might-take-long-time-to-generate">Pattern with unspecified length might take long time to generate</h3>
<p>Sometimes Fare wants to generate extremally long phrase for pattern which doesn’t specify length.
I have seen cases for which xeger needed 10minutes to generate! Unfortunately for now there is no way to configure it in Fare (but it’s open source, you can improve it 😺).
You can assume that it’s nondeterministic, because you’ll never know for which regex and with which random (or not random) value it will happen.
What I do? Before I pass pattern to Xeger, I remove every <em>*</em> character. Asterisk means 0 or more characters, so this way it will always be one, which is correct, but of course it’s trade-off for more limited results.
I know that there are still other possible regexs of unknown length, for example <em>\w{3,}</em> or <em>\d+</em> but in my case it’s enough, I don’t expect such patterns.
If it’s not enough in your case, then you should process other possibilities too, to remove every option which takes any length,
or not to remove, but to provide simple values for those basic rules. Or fork Fare and allow to configure this behaviour in it :)</p>
<h3 id="always-trycatch-and-be-prepared-for-bugs-and-exceptions">Always try..catch, and be prepared for bugs and exceptions</h3>
<p>Unfortunately Fare has bugs. Sometimes it crashes, even with simple patterns.
For example creating xeger with pattern <em><a.*b></em> will cause <code class="highlighter-rouge">System.ArgumentException: 'a.*b' not found</code>.
Once I have seen a bug, which allowed creating not valid input. It turned out that <code class="highlighter-rouge">Xeger</code> treated multiplied <em>start/end of line</em> marks like regular characters. Input would be fine, but it had <em>^</em> or <em>$</em> character at the beginning and/or at the end.
Such pattern came to my system only once, but this particular one was important to me, so I changed my code to check whether generated input is valid
and if it’s not, then try to fix it with trimming every <em>^</em> and <em>$</em> characters.
I know that it’s naive, but if it doesn’t help I just skip the pattern, it is allowed in my case (in general) - not every regex need to be inverted,
occasionally I can skip one and it’s fine. You can reproduce this bug this way: <code class="highlighter-rouge">new Xeger("^0$|^1$", new Random())</code> (in my environment it’s always <em>0$</em> or <em>^1</em>).</p>
<h3 id="you-may-find-unsupported-pattern">You may find unsupported pattern</h3>
<p>As you know regex is wide and you might find construction not implemented by xeger. But majority of patterns are satisfied and to be honest -
I can’t tell which are not. There is no documentation in Fare project, and the one in <a href="https://github.com/bluezio/xeger">Java’s xeger</a> is not up
to date, because I have checked some limitations they have mentioned and those not supported patterns (as they say) work properly… So there are probably some not implemented cases, but it’s minority :)</p>
<h2 id="summary">Summary</h2>
<p>So to summarise, fare is a great library and does the job but… not entire job.
You need to add your own <em>few lines of code</em> and get prepared for exceptional situations and bugs.
In my case it’s enough and loosing input occasionally is acceptable in my situation.
If it’s not acceptable in yours, I still recommend using Fare but with fixing/extending it first.
That way or another it’s cheaper to start from theirs code base than writing everything from scratch.
<a href="https://github.com/moodmosaic/Fare">They’re open source</a> so you can share your work with pull request, to help others and bring yourself a bit of splendour :)</p>TometchyMatching text using regex patterns is extremely useful. But sometimes we need to invert this process and create text which will match the regex. The solution has already been written.